… or actually, a few Raspberry Pis! I’d like to install the Zabbix monitoring suite and have decided to split up the workload across 3 Raspberry Pi 3B’s. Just like in actual production, we’ll have a Zabbix front-end, a Zabbix Proxy polling server, and a Raspberry Pi database server.
The Story So Far…
IF you’re a regular reader of this site, you know I have Saltstack installed on all of my Raspberry Pis. So, I did a fresh install of Raspberry OS on each of my RPIs. I ran an “apt update” and an “apt upgrade”. I moved / to a SanDisk USB drive. Zabbix is a VERY active process and really should be run from an external drive and NOT from an SD card! I just leave /boot on the SD and use that. Reading the boot files from the SD card is fine. Lots of multiple little writes to the SD card are very detrimental to the longevity of the SD card.
The Zabbix Platform
Zabbix actually has three distinct parts. The front end, the database, and the proxy server. You can split up these 3 services onto 3 separate servers, or if you’re only monitoring a few things, install everything on one Raspberry. I’ve got an RPi 4 and a dozen other Raspberries to monitor, so everything’s going on one. In all honesty, I’ve got a MariaDB server running on a LINUX box, so I’m going to use that for my DB server. If you run the db server on a Raspberry, make sure you’re using an m.2 drive or USB drive. All those little reads and writes will DESTROY an SD card!
Zabbix Front-End
Let’s install the main Zabbix server first, then we’ll go through setting up the external database server and then finally the proxy server. I generally log in as root and do installations, because I don’t always remember to type “sudo” to preface all the commands and I get confused about why everything doesn’t work. If you are comfortable operating like this, just remember to drop out root’s account when you’re ready to start testing things and playing around! So, the next couple of command install the Zabbix repo, populate it and then pull down the requested packages. I’m doing the 6.0 LTS version. There’s currently a 6.2 available, but I’m not that brave! Run these next couple of lines as root:
wget https://repo.zabbix.com/zabbix/6.0/raspbian/pool/main/z/zabbix-release/zabbix-release_6.0-4+debian$(cut -d"." -f1 /etc/debian_version)_all.deb
dpkg -i zabbix-release_6.0-4+debian$(cut -d"." -f1 /etc/debian_version)_all.deb
apt update
apt -y install zabbix-server-mysql zabbix-frontend-php zabbix-apache-conf zabbix-sql-scripts zabbix-agent
systemctl reload apache2
Put that on to simmer and we’ll move on to the database server!
Zabbix Database Server
Of course, you can install the database server on the same Raspberry, but I like to try to model a production environment with my fleet of Raspberries. We’ll do a stock install of MariaDB for Zabbix, with a couple of tweaks that we’ll revisit later.
Using apt is the easiest way to get the database server installation underway. It has a bunch of dependencies, so let apt worry about all of that. As you can see, apt has our back on this one:
root@zab-db:~# apt -y install mariadb-server
Reading package lists… Done
Building dependency tree
Reading state information… Done
The following additional packages will be installed:
galera-3 gawk libaio1 libcgi-fast-perl libcgi-pm-perl libconfig-inifiles-perl libdbd-mysql-perl libdbi-perl libencode-locale-perl libfcgi-perl libhtml-parser-perl
libhtml-tagset-perl libhtml-template-perl libhttp-date-perl libhttp-message-perl libio-html-perl liblwp-mediatypes-perl libreadline5 libsigsegv2 libsnappy1v5 libterm-readkey-perl
libtimedate-perl liburi-perl lsof mariadb-client-10.3 mariadb-client-core-10.3 mariadb-server-10.3 mariadb-server-core-10.3 socat
Suggested packages:
gawk-doc libclone-perl libmldbm-perl libnet-daemon-perl libsql-statement-perl libdata-dump-perl libipc-sharedcache-perl libwww-perl mailx mariadb-test tinyca
The following NEW packages will be installed:
galera-3 gawk libaio1 libcgi-fast-perl libcgi-pm-perl libconfig-inifiles-perl libdbd-mysql-perl libdbi-perl libencode-locale-perl libfcgi-perl libhtml-parser-perl
libhtml-tagset-perl libhtml-template-perl libhttp-date-perl libhttp-message-perl libio-html-perl liblwp-mediatypes-perl libreadline5 libsigsegv2 libsnappy1v5 libterm-readkey-perl
libtimedate-perl liburi-perl lsof mariadb-client-10.3 mariadb-client-core-10.3 mariadb-server mariadb-server-10.3 mariadb-server-core-10.3 socat
0 upgraded, 30 newly installed, 0 to remove and 0 not upgraded.
Need to get 18.4 MB of archives.
After this operation, 150 MB of additional disk space will be used.
Answer “y” and let it do its thing. Once it completes, use the secure install routine to set the password and set the scene for use.
Zabbix Database Security
Here are my answers (edited for brevity):
root@zab-db:~# mysql_secure_installation
Enter current password for root (enter for none):
Set root password? [Y/n] Y
New password: ZabPass
Re-enter new password: ZabPass
Password updated successfully!
Remove anonymous users? [Y/n] Y
Disallow root login remotely? [Y/n] Y
Remove test database and access to it? [Y/n] Y
Reload privilege tables now? [Y/n] Y
Thanks for using MariaDB!
root@zab-db:~#
Create the Zabbix Database tables
Now that the database installation is cleaned up and secured, we ca n execute a couple of command lines to create the initial required database and give the zabbix user access to it from the zabbix server:
mysql -uroot -p'ZabPass' -e "create database zabbix character set utf8 collate utf8_bin;"
mysql -uroot -p'ZabPass' -e "grant all privileges on zabbix.* to zabbix@zabbix.local identified by 'ZabPass';"
Once the (empty) database is built, we need to create the tables and schema. The file to do this is provided. We just need to uncompress it and cat it over to the zab-db server:
zcat /usr/share/zabbix-sql-scripts/mysql/server.sql.gz | mysql --default-character-set=utf8mb4 -uzabbix -p'ZabPass' zabbix
This took just over 3 minutes on my installation. Once it’s done, we can turn our focus back to the zabbix server. We need to configure the connection between the two. Edit the config file:
vi /etc/zabbix/zabbix_server.conf
I’m changing two things: the name of the database server and the password to be used to access it.
DBHost=zab-db
DBPassword=ZabPass
Finally, set the mysql process to listen for incoming connections. This is accomplished by editing the main mysql configuration file:
root@zab-db:~# vi /etc/mysql/my.cnf
Add a single section called [mysql] and to it add the whole network as the bind address. You can narrow this range, if it makes you feel more secure.
[mysqld]
bind-address = 0.0.0.0
#skip-networking
Start Zabbix and its Agent
Let’s start this thing up in place. We’ll move the agent off to the proxy server in a bit, once we’re happy that things are working as advertized:
systemctl restart zabbix-server zabbix-agent
systemctl enable zabbix-server zabbix-agent
Configure and Start Apache
The webserver is a snap to config and start. Edit:
vi /etc/zabbix/apache.conf
and edit your timezone. Grep for “timezone” and change it to your local. You’ll find it twice in the first 30 or so lines. Don’t forget to uncomment those lines as well! Once you’ve saved the config, enable the httpd service and start it!
systemctl enable apache2
systemctl restart apache2
Finally, head over to your new Zabbix server with your browser. (Happy we’re finally off the command line?) The address is http://zabbix/zabbix. If your DNS isn’t set up, use IP address of the server instead of the first “zabbix” in this URL.
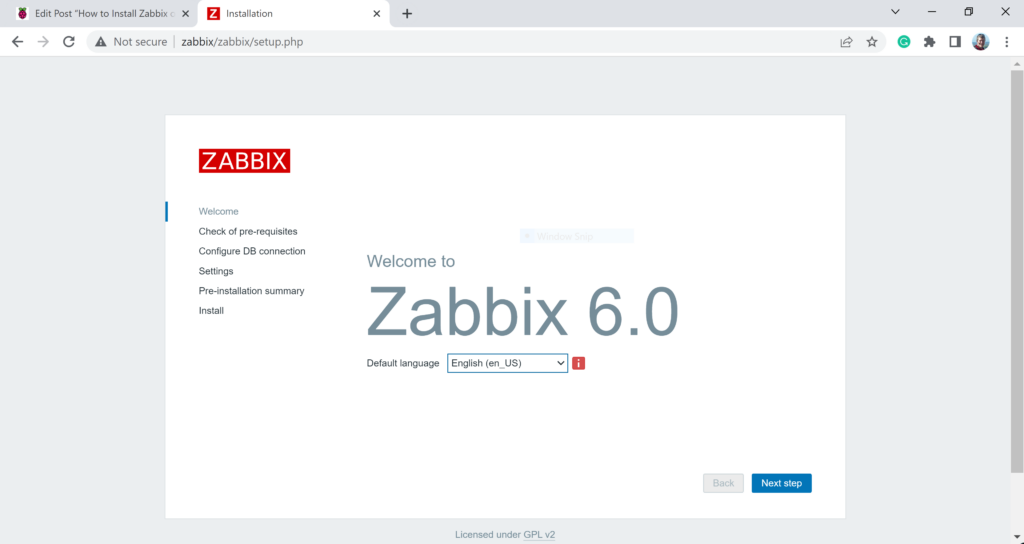
Now, follow the guide. Click “Next”. Scroll down through the Pre-requisites. All green! Next. Configure the database connection. I had to uncheck the secure connection checkbox. You know the rest of the answers:
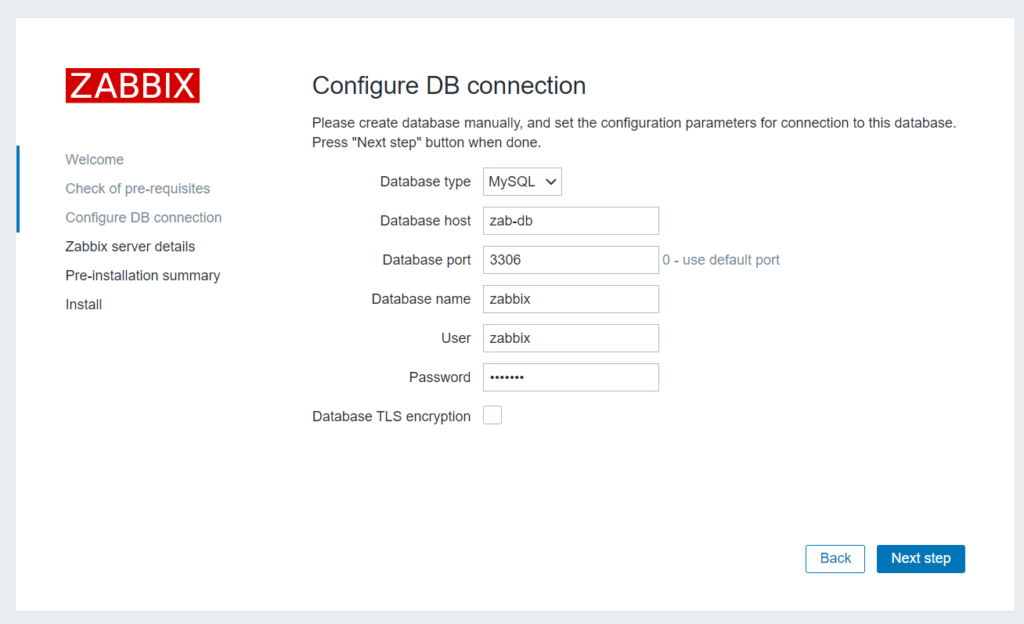
We can take the defaults on the zabbix server connection, so just hit Next. Next again on the summary page and you should get the welcome page! The default account is “Admin” with the password “zabbix”.
We did it! We’ve got a running Zabbix Monitoring Server! I’ll leave you to it. The first thing I’m turning on is autodiscovery so it can start figuring out what’s on my network that’s worth monitoring. In the left-hand menu, click Configuration, and then open Discovery. Type a name for the process in the box at the top of the page. I used “all hosts”. Check the box next to your local network and then “Enable”. Answer Yes and you’ve enabled hourly scanning for new hosts, running the agent, which you can download from here: https://www.zabbix.com/download Click the Zabbix Packages box and then each of the options in the columns to get the right agent for Zabbix 6.0 and Raspberry Pi running Bullseye (if your RPi versions are up-to-date.
You’ll have to also turn on the Discovery Action. When a new host is discovered, the action to be taken should be to put it into inventory. From the left hand menu, choose Configuration > Actions > Discovery Actions. Click on Disabled to toggle. Now, just wait!
The instructions are online and pretty well laid out:
https://www.zabbix.com/documentation/current/manual/installation/install_from_packages/debian_ubuntu
Have fun!