Back in the day, you could use raspi-config to play with the clock speeds to overclock your Pi. Those were also the days of dire warnings of mysterious settings being written to OTP memory, marking your RPi as having been overclocked and therefore voiding its warranty. I’m yet to burn out a Raspberry or make it less reliable by tinkering with overclocking. Here’s a recent thread from Raspberry that should assuage these fears:
https://www.raspberrypi.org/forums/viewtopic.php?t=283911
I have found that the thermal throttle on the board works really well. When the core temperature is between 80’C and 85’C, the ARM cores will be throttled back. If the temperature exceeds 85’C, both the ARM cores and the GPU will be throttled back. If you put values that push the limits too much, the Raspberry won’t completely boot. So, the Raspberry’s built-in self-preservation methods DO work!
If you really want to overclock your Raspberry, you’re going to have to keep it cool. There’s countless cooling solutions on the market. In this post, I’m going to compare a few of them and see how hot and fast we can go!
I’m starting with 4 similar RPi 4’s with a freshly installed OS, that’s been updated and moved off to the USB drives. I’m running StressBerry to create the CPU load and the charts. It’s pretty simple to use, ONCE you get all of the prerequisits installed. I’m running Raspberry Pi OS Lite, so I had to install a couple of extra packages to get it to run.
Here’s what I did to install:
apt install python3-pip
pip3 uninstall numpy
apt-get install libatlas-base-dev python3-numpy libopenjp2-7 libtiff5 stress
pip3 install stressberry
Once installed, you can run it:
stressberry-run -h
… not a ton of options, but you can set how long you want to run and whether or not to have a little baseline at the beginning and end of the test. I’m testing 4 RPis that I’m naming node[1-4], so I’ll include that name on my command line to keep things honest (and sorted).
stressberry-run -n "node1" -d 300 -i 60 -c 4 node1.out
This will run the test named node1 for 5 minutes with a 1-minute porch on both ends. It will use all 4 cores and output the results to a file named node1.out.
Once the test is complete, you can run the accompanying program to graph the results.
MPLBACKEND=Agg stressberry-plot node1.out -d 72 -f -l 600 2000 -t 20 90 -o node1.png --not-transparent
This will create a file named node1.png in your current directory. I set the dpi to 72 (since that looks good on screen). I wanted to graph the frequencies between 600-2000 plotted and the temp scale limited to 20-90C.
Here’s my chart:

So far, so good. The thermal throttling actually never even kicked in! You can see that the RPi was hovering between 700-800MHz (orange line) and the temps (blue line) started around 47C. After 1 minute, stressberry started the computational loading. The RPi turned up the clock to 1.5GHz and the temperature climbed like new CoVid cases in Dakota! The temperature never hit 80C, so no throttling took place. Good job, node1!
Crank the Speed!
The MagPi published a good article about “safely” overclocking your Raspberry. Here’s what they suggest. Edit your /boot/config.txt file and add these two lines:
over_voltage=6
arm_freq=2000
I just stuck them at the bottom so I could find them again. “over_voltage” gives the Pi a little more power than usual. “arm_freq” is the turbo speed to use when under a load. Reboot and run the stressberry program again. Plot the results and have a look at the resultant .png file:

Now we see the issue! When the Raspberry tries to run at 2.0Ghz, not only does the temp spike but then the throttling kicks in — over and over! It’s like a little vicious circle when the throttle kicks in, the temp drops a little, the speed goes up again, the temp goes up again, the throttle kicks in again …
Solution: Cooling!
So, we really do need a fan, or SOMETHING! But what? There’s a ton of choices. Let’s try a couple of different options and see what really works.
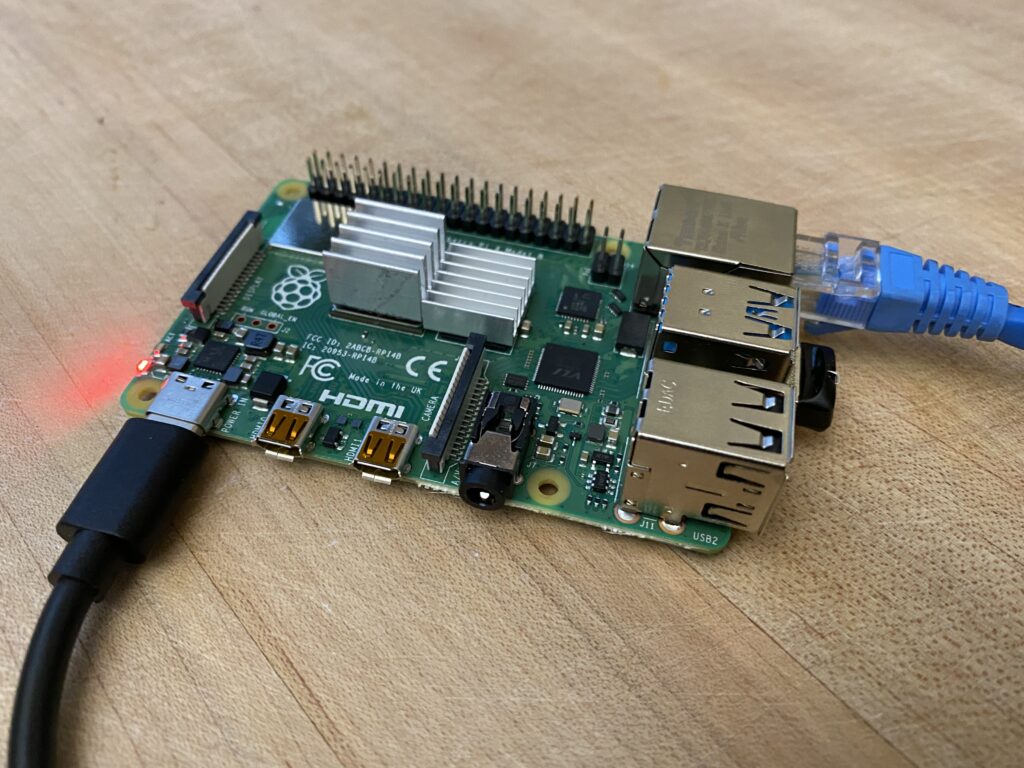
I’d like to test the efficacy of the cute little aluminum fins that you get for free with every case.
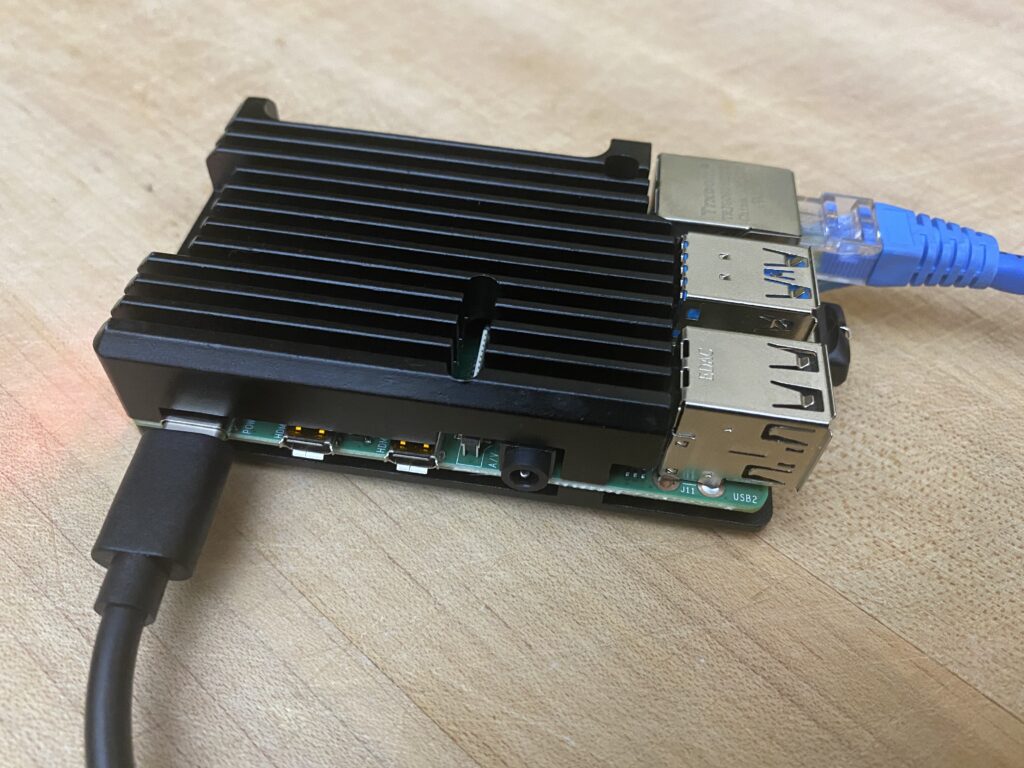
Next, on the list is on of those Aluminum Alloy Heatsink Case that I found on Amazon. You know the ones that make the whole thing look like a giant heatsink!
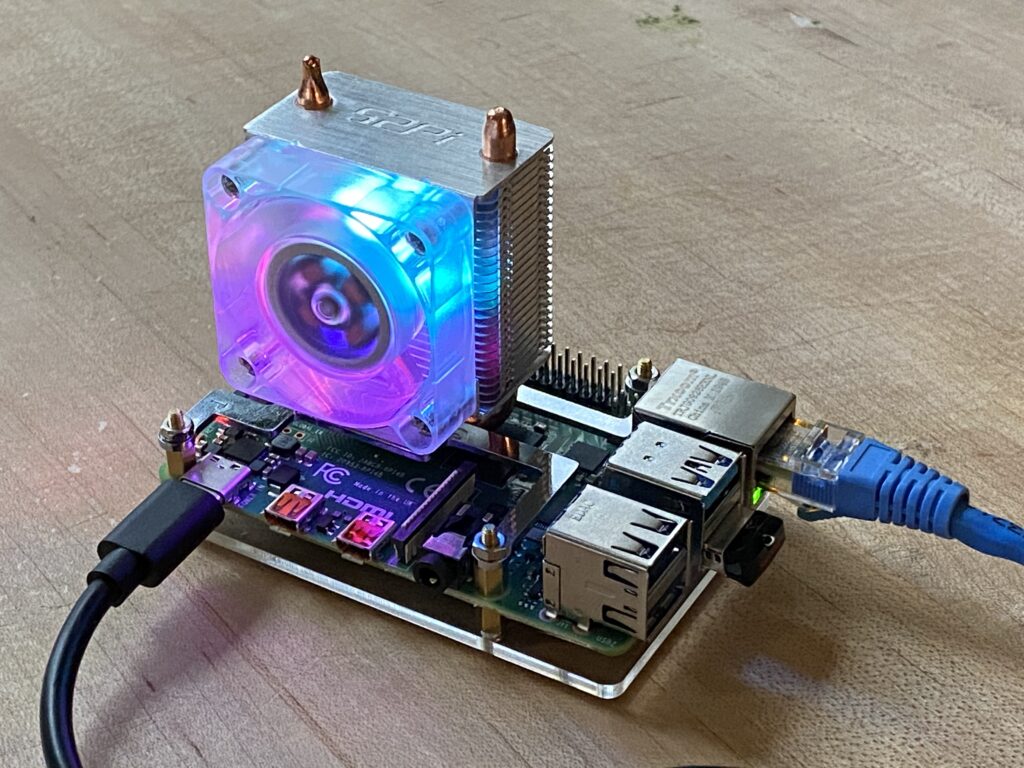
Also on Amazon, the Raspberry Pi ICE Tower Cooler with RGB Cooling Fan. Twice the price, but ten times cooler! Lots of people are using these in really cool case projects that I’ve been seeing on Reddit.
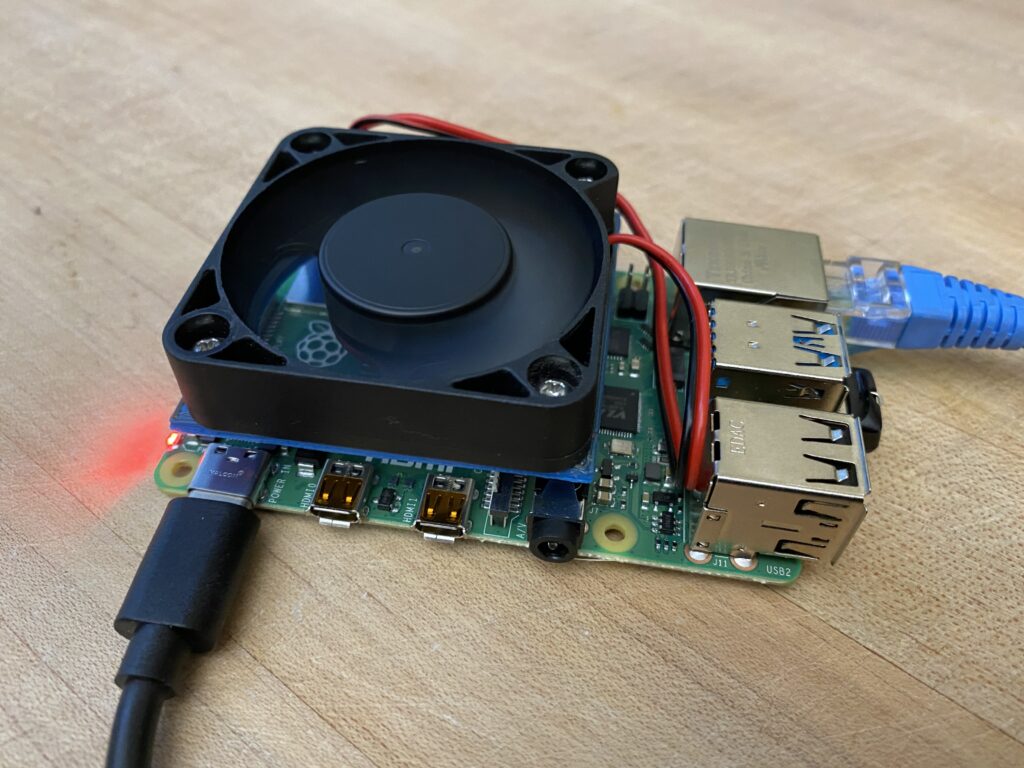
Finally, a little 3D printed fan cooler that just holds a 30×30 fan over the CPU.
Baselines
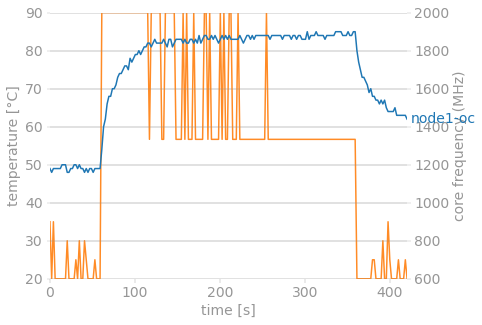
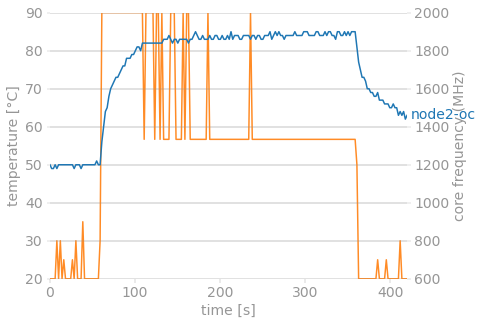
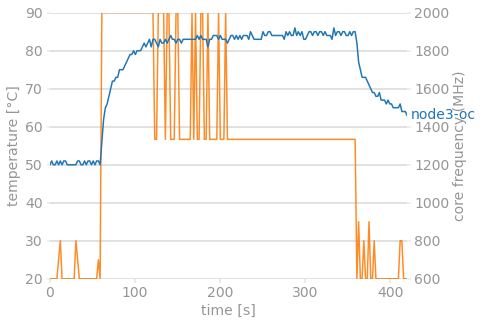
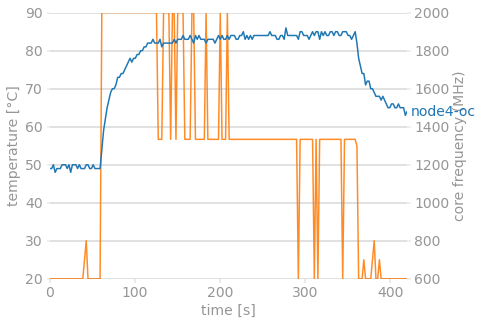
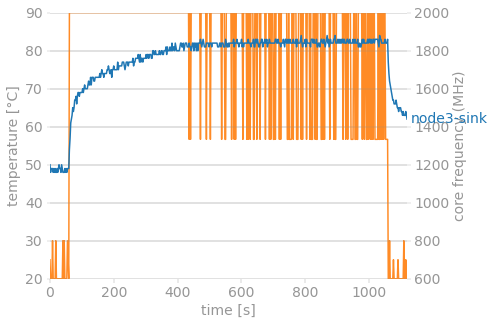
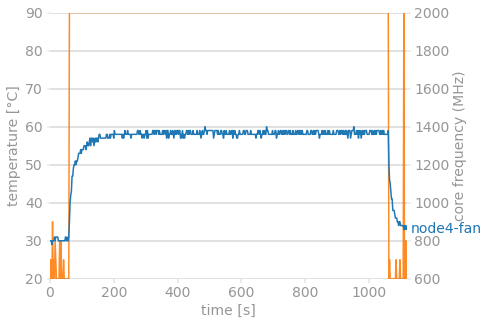
I increased the runtime to 1000 seconds for these tests. After 5 minutes, temps were just starting to get up into the 80s, so I added a couple of minutes to push these guys to failure.
.local/bin/stressberry-run -n "node3-sink" -d 1000 -i 60 -c 4 node3-sink.out
Small Aluminum Heatsinks
Don’t do much. They really didn’t do much. Now I know why I’ve always thrown them away. No harm in leaving them in place, but if you’re overclocking, keep shopping.

Heatsink Case
Worked a little better. You’re not going to be able to overclock with this setup. It might be good for a Kodi system where you can’t have any fan noise but you need a little something for cooling.
Ice Tower for Pi
I was really surprised by how well this worked. I was also surprised by how cool it looked. I’m keeping this one and putting it on my Minecraft server. Just for fun, I set the clock speed to 2150 and the test completed! I thought I’d push my luck and go to 2500, but the Raspberry wouldn’t boot. I had to pull the SD card and put it in a card reader to edit the /boot/config.txt file back to a bootable state.

DIY 3D printed Fan Holder
Lastly, I tried a homespun approach. I printed a header cover with a flange on it with a hole to accommodate a salvaged 40×40 fan. Not pretty, but highly practical. Kept the temps low and the clock speed high. Just don’t put it where your friends will see it…
In Summary
If you want to run still and quiet, look into the heatsinks that are just solid metal stuck to your CPU and GPU with a little thermal pad. If you need (or just want) to overclock, you’re going to need a fan.
Thanks for the post.
How did you wire the ‘homespun approach?’ Just directly to 5v on GPIO?
Yes, exactly. You can use 3.3v or 5v depending on cooling needs. If the 5v (pin 2) is too fast and therefore too noisy, use the 3.3v (pin 1). Pin 6 is right in the neighborhood for ground.