Wouldn’t it be nice to get an occasional email from one of your Raspberries when something is wrong? Maybe your filesystem is filling up or the monitoring you’ve set up needs to alert you that some of the network devices are overheating. Back in the day, you could just run Sendmail and pipe some text to your email address. But, because of all the spammers in the world, the email relays have gotten much more stringent of who could just dump email messages on their servers for delivery. If you’ve got a Gmail account, there’s a fairly straightforward way to allow your Raspberries access to your Gmail in a fairly secure fashion.
How Does eMail Work?
There are actually quite a few moving parts to getting a message from your Raspberry to your Gmail account. Whether it be Sendmail or Nagios, is the MUA or “mail user agent”. It puts the email header and body together and then passes it off to an MTA or “mail transport agent”. The MTA must be configured to get the email out the door, off your Raspberry, and out to a mail relay. You can configure that MTA on your server once and forget it. Once you get things working, mail will just work. But we need to make sure that our MTA has a reliable connection to a relay. Gmail offers a great relay service but enforces security. Gone are the days of a simple SMTP connection on port 25! Today, Gmail requires that your incoming connection be secure. There are facilities for highly secure connections for your enterprise and of course cost, but I want to focus on free, secure, and easy.
Security!
Luckily, we don’t need to reinvent the wheel to get our email for work. We just need to make sure that our wheel stays in its lane. We’re going to be using TLS to create an encrypted tunnel connection from the MUA to the mail relay at Gmail. Think of the protection offered by ssh with SSL–same game! Once we get there, we will also need to authenticate to Gmail, but we can use our existing Gmail account and password, so no big stretch there.
msmtp
Sure, all of this sounds like a tall order, but relief is on the way! msmstp is a lightweight (as compared to trying to configure Sendmail) MTA. It’s secure, small, free, and runs quietly in the background. Let’s get a few things installed, and then we can look at configurations. We don’t need to install much:
apt install bsd-mailx msmtp msmtp-mta
If you’re not logged in a root, you’ll need to prepend “sudo ” to this line. Don’t forget “apt update” as a first step to getting your repos in sync.
Configuring Secure eMail
You can follow the default installation methods and install msmtp for one user. I wanted the MTA to be available system-wide. I’m the only user, but there are multiple procs running that might want to get in touch with me! Keep in mind that every email emanating from this Raspberry will be going through your Gmail account.
OK, the config is in /etc/msmtprc and it looks like this:
#Set default values for all accounts.
defaults
auth on
tls on
tls_starttls on
tls_trust_file /etc/ssl/certs/ca-certificates.crt
logfile /var/log/msmtp.log

#Gmail settings
account gmail
host smtp.gmail.com
port 587
from yourname@gmail.com
user yourname
password D33pD4arkS3cr3t

#Set a default account
account default : gmail
In effect, what we’re doing is saying: all users will default to mailing through this account, use TLS, log to file, use Gmail’s SMTP relay on port 587, connecting with our Gmail address by authenticating with our username and password. Secure this file, as there’s a clear text password in it:
chown root:msmtp /etc/msmtprc
chmod 640 /etc/msmtprc
Yes, You Can Encrypt Your Password
Passwords for msmtp can be stored in plaintext, encrypted files, or a keyring. Setting up an encrypted key is not hard to do. First, you’ll need a gpg key, then you’ll use that to encrypt your password. So, let’s generate a key:
gpg --full-generate-key
I just accept all the defaults. Leave the passphrase blank because you won’t be around to enter it. This is being used by automated processes. If you want a REAL key, generate more! Anyways, you’ll need to wiggle your mouse or stir the keyboard to create entropy to help randomize the key. It honestly didn’t take very long on my RPi4…
If you want to see what you’ve got, type the following:
gpg --list-secret-keys --keyid-format LONG
…and you’ll see your new key. Now that you’ve got a key, you can encrypt your password:
gpg --encrypt --output=msmtp-password.gpg --recipient=yourname@gmail.com
Type in the password that you’re encrypting on the blank line and hit enter. The cursor will move down. Hit CTRL-D to end the process. Move the generated file (msmtp-password.gpg) to /etc/. Edit the password line in your /etc/msmtprc file to reflect the fact that your password is now encrypted:
passwordeval gpg --decrypt /etc/msmtp-password.gpg
Alright! Let’s check our work. Try this simple one-liner to test:
echo "BEEP BEEP" | mailx -s "Subject: This is a test!" yourname@gmail.com
You should get an email in your inbox, fairly immediately. If this test works, it should work for anything that tries to email you from this Raspberry! Cool, huh? And we didn’t have to configure Sendmail!
IF you DO get an error
It probably looks like this:
root@mail:~# echo "BEEP BEEP" | mailx -s "Subject: This is a test!" [email protected]
send-mail: authentication failed (method PLAIN)
send-mail: server message: 535-5.7.8 Username and Password not accepted. Learn more at
send-mail: server message: 535 5.7.8  https://support.google.com/mail/?p=BadCredentials f33sm9715130qtb.56 - gsmtp
send-mail: could not send mail (account default from /etc/msmtprc)
Can't send mail: sendmail process failed with error code 77
root@mail:~#
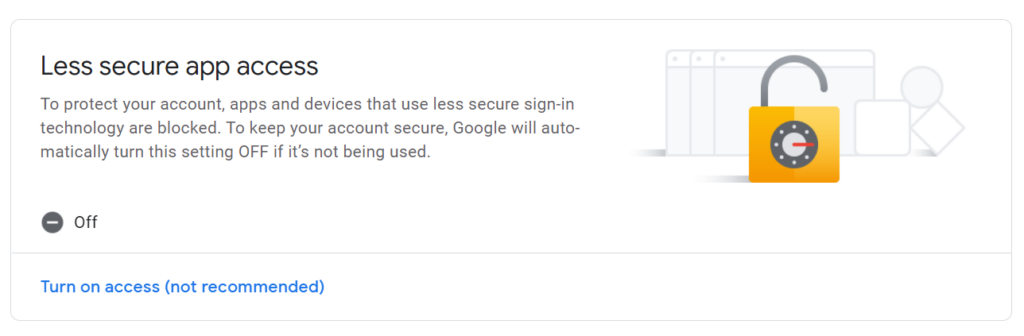
Remember I mentioned security? Yeah, we’ve got to ratchet down the security at gmail. We have to “Allow less secure apps” in order to get this to work. The first two comments below brought this up. I changed this setting years ago and forgot about it. Let’s go over to google.com and adjust some settings.
Go to Google and sign in and then to Account Settings. It’s in the 9-dots pull-down menu (AKA “the waffle” or the “App Launcher Icon”, next to your picture in the upper right.
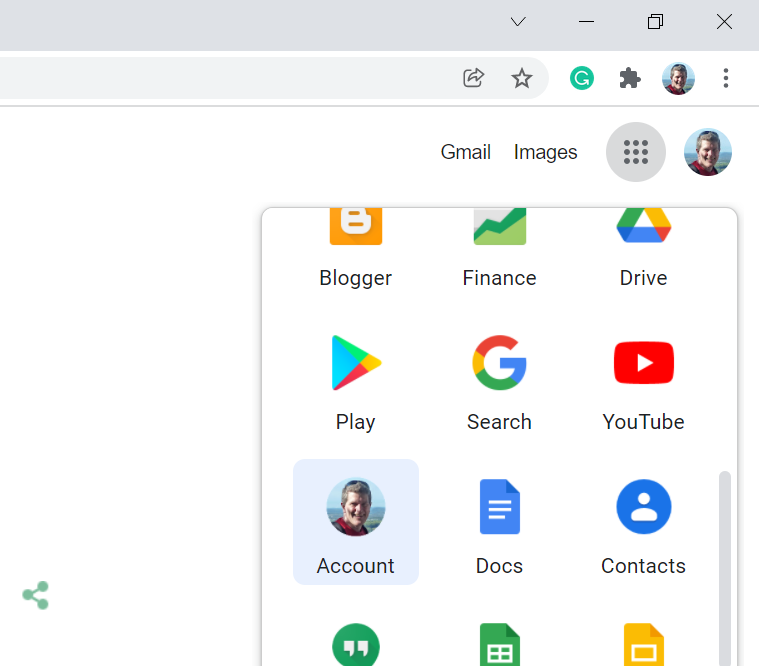
Now, from the left hand column menu, choose “Security” (4th item down). Scroll down until you find “Less Secure App Access”.
John,
Thanks for the quick tutorial. It didn’t work right away as my google account settings was at the default security which will not allow “less secure apps”.
So, once I allowed that option everything worked without doing any other security steps on the pi.
Thanks.
David
Hey John,
thanks for the great and easy tutorial.
As David already wrote, it also did not work for me right away.
I tried enabling “less secure apps”, but as google removed this you now have to enable 2-factor authentication and create a specific App-Password, which you use for only your raspberry. This can all be done in the google account settings.
This even has the advantage that you do not have to store your “real” gmail-password on your pi.
Thanks again,
David
Thanks for the comments! I added a little bit more to the post describing how to get this to work!!
Thanks, this is exactly the info I needed to set up my pi to text and email alerts to me! And along the way, you cleared up a mystery for me about using gpg with unattended scripts; I hadn’t understood how to make it not require a password.
I fell at the first hurdle! No /etc/msmtrpc.conf after I did the sudo apt install bsd-mailx msmtp msmtp-mta. It was early morning! I created the file but got password errors. Now ploughing through Google security, 2-step authentication, etc.
You may need to create msmtrpc.conf as a new file!
Many thanks for putting this together, it’s just what my pi was missing.
I have ran into an issue with gpg 2.2.27, it will not accept a blank passphrase. Google hasn’t been of any help, how did you do it?
Many thanks in advance.
Oh, yuck! You’re right! It’s a new feature. Try this.
Get the ID of your key like this:
gpg –list-secret-keys
This will output a few lines similar to below. The key ID is the value XXXX
/home/username/.gnupg/secring.gpg
———————————-
sec 4096R/XXXX
uid name
ssb 4096R/YYYY
Open the gpg key edit submenu like this:
gpg –edit-key XXXX
You will see information about the key.
Type passwd at the prompt to change the password:
gpg> passwd
Enter your existing passphrase.
Enter the new passphrase for this secret key. (Leave this blank and press Enter)
Press Enter twice and consider the warnings from the tool and its implications before proceeding.
Thank you John,
I’ve been playing with this for 5 days so I get notified when APCUPSD has an alarm. I saw your post first; but hung on the config file not existing. Should have read further and saved myself the pain of sendmail and postfix. On the bright side, it forced this old fart to get into the CLI and file structure; not to mention mtail and all the log files. It’s been a fun adventure. Again, thank you for the great article.
John, It looks like google is removing the “less secure app access” effective 5/30/22. Do you have any suggestions on how to continue to utilize gmail for sending email from a raspberry pi? Thanks, Vic
Ugh! Yeah, I saw that, too. I’ll work on it! I’m thinking we’re going to have to go back to using the ISP’s mail servers…
App-specific passwords should still work, even though the “less secure apps” does not (any more).
I’m about to start going through all this so that my Pi can email me, but I’m curious about one thing. Does this only allow my Pi to send an email to the address used in the setup? Or can it send email to other addresses?
I’ve seen several posts with similar instructions (although this seems to be the easiest to follow), but none of them mention sending email to other addresses.
It can mail to any address!
Has anyone gotten this to work from Python as in
import os
os.subprocess.call(echo “whatever” | mailx -s…
Also note the app complains about a missing log file which you can create and give permissions.
Thanks much for the article, so many of them are dated.
Cannot decrypt password:
passwordeval gpg –decrypt /etc/msmtp-password.gpg
-bash: passwordeval : command not found