If you’ve got lots of Raspberries that you want to try to keep track of – you’ll need an easy-to-use, fully-functional DHCP server. Pi-hole is a good one. Pi-hole can be a GREAT one with this little trick. Once you’ve got pi-hole up and running, check out the DHCP server that it ships with! Go to Settings and then the DHCP tab from the top menu.
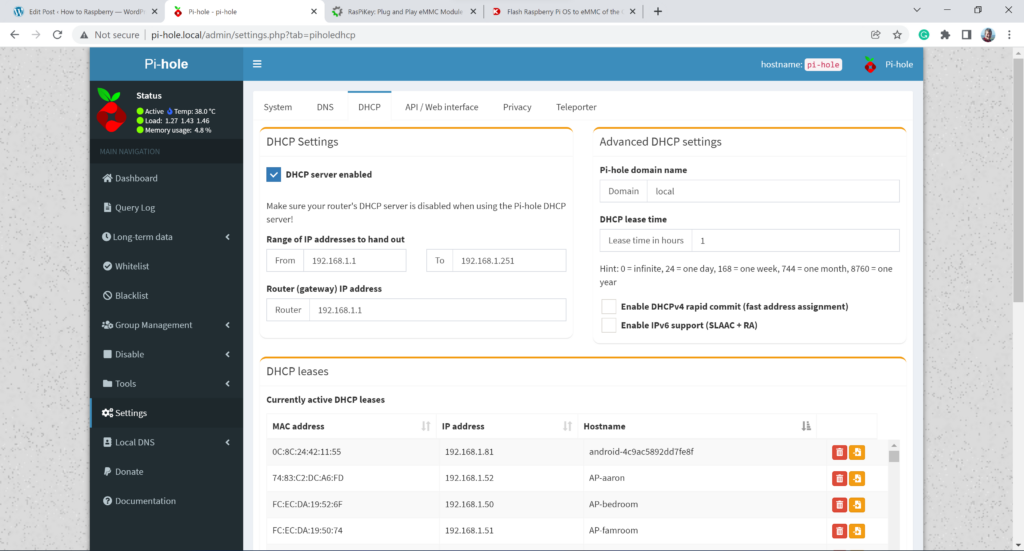
Click the DHCP-server enabled checkbox. Be sure to turn off any other DHCP server you may have running on your network. Maybe on your other Linux servers or, more likely, on your router.
Set up the range of IP addresses that you want to be offered. If your current address of your pi-hole is 192.168.1.x then be sure to use this as the range of IPs.
Set a Hostname on Your Network
What I like about this DHCP server is that you can edit the existing “DHCP leases” to make them static! Notice the column of orange boxes on the far right? Click one. Now scroll to the bottom of the page.
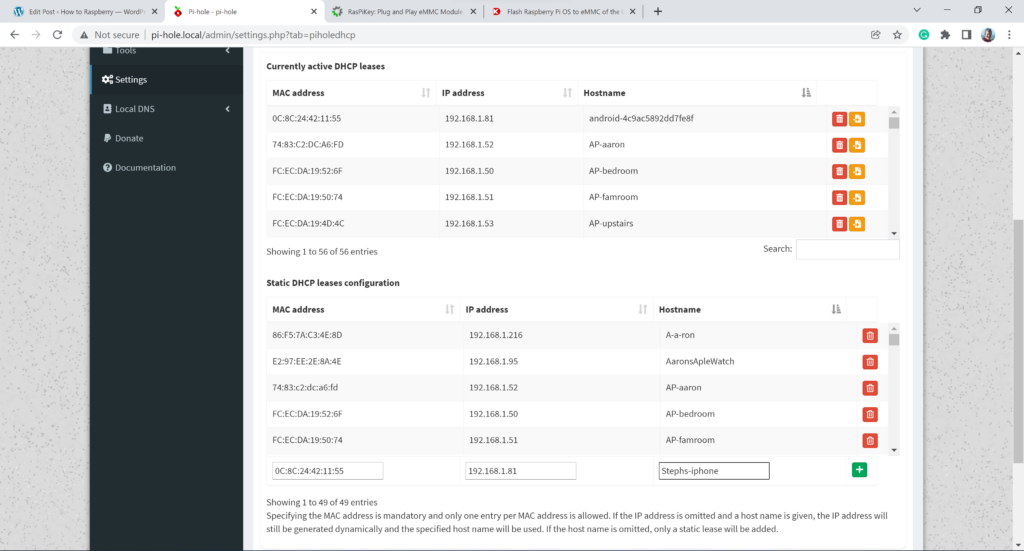
Here you can edit the obscure android phone name with a real hostname. Make the edits that you need and then click the green plus sign box. Since the pi-hole is my DNS server, the name that I put here is reflected in my other management platforms, in arp tables, and all sorts of other useful places.
Extra Bonus Hidden Feature
One last note of mention is this file:
pi-hole:/etc/dnsmasq.d/04-pihole-static-dhcp.conf
Cat this file out. It’s a file of all your hostnames, MAC addresses, and IP addresses! Very cool! Handy for editing in Excel, porting all your hosts to management and monitoring systems, OR if you’re brave, you can make wholesale changes to your whole network setup! Have phun!