
Yeah, it was inevitable. You knew that I’d have to try to farm chia with my Raspberries! It took me a couple of weeks to figure out my farm, but I got it running! The game with chia is not proof of work, like most currencies, but proof of space. In short, you use a powerful CPU to create 100G files called plots, and then a less powerful computer to read the plot files and offer them to the Internet. These plots are like lottery tickets–if you create more and more of them, you increase your chances of winning a Chia coin. The troubles are many. You need a lot of plots to win! According to chiacalculator.com, if you were to “farm” just one 4TB hard drive, you would be expected to win in about 5 years’ time. And that’s no promise, just a statistically based estimate of how long you would have to keep your 4TB farm up and running in order to win a chia coin.
BUT, and that’s a pretty big “but”, you could win. If you’re like me and you love tinkering with the latest silliness on the Internet, you have a couple of hard drives collecting dust, and need a new Raspberry project, follow me!
Creating the Plots
Once you have a hard drive full of plot files, you can use your Raspberry. Don’t try to plot with a Raspberry. It will work, but it takes about 4 hours to create one plot. The plots are 100GB each. Filling up one 4T hard will take–well, you do the maths! You’re going to want to dedicate a powerful computer to creating hard drives full of plots. You’ll also want to have a decent Windows computer to be your main farming computer. That computer will be connected to the Internet, keep track of your harvesters, maintain your wallet and keep your copy of the blockchain synced. The instructions to set up a windows chia farmer are all on chia.net. However, for plotting, I highly recommend madMAx running on a Windows computer. It’s a highly tunable plotter that takes great advantage of RAMdisks and M.2 drives. I dock my bare drives in a SATA dock attached to my gaming computer via an eSATA port adapter. (Don’t forget the cables!) Your other option is to just use external USB hard drives, but make sure you have the ones with AC power adapters. Your little Pi will not like powering hard drives through the USB ports. Once you’ve got your “destination drive” connected, set up madMAx to run continuously until it fills up the drive. While that’s cooking, let’s turn our attention to getting the Raspberry going.
Chia Raspberry Setup
You’ll have to install the 64-bit version of Raspberry OS or Ubuntu to get the Chia farming software to work. I’m using Raspberry OS 64, which you can find here. If you like Ubuntu, grab the Raspberry 64 distro here. Copy your download to a thumb drive with Etcher and boot up your Raspberry. If you need some help with these steps, look at the tutorials on the bottom of the left side of this page.
Once you’re happy with the configuration of your Raspberry, passwords, timezone, networking, etc., you’re ready to install the Chia software. ssh to the Raspberry and login as “pi”.
Hopefully, you’ve already run:
sudo apt update
sudo apt upgrade
and now you’re ready to run the following steps. First, you’ll need to install git and some python stuff:
sudo apt-get install -y git build-essential python3-dev
Clone the Chia git repository containing the latest version.
git clone https://github.com/Chia-Network/chia-blockchain.git -b latest
That’s all the downloading we need. Let’s get to work getting the chia software running. The steps will try to guide you to the next step to type in, but don’t listen. Just type in these 5 lines:
cd chia-blockchain
sh install.sh
. ./activate
chia init
chia start farmer
Stealing some files …
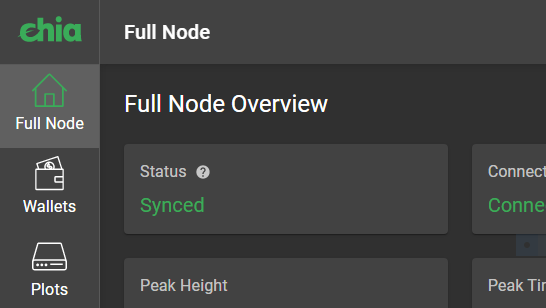
At this point, we have a complete farmer running. We need to do a little finagling to get this guy to be a fully compliant harvester and member of our farm. Back on the main farming system, which is now, hopefully, running and completely synced. The first computer you sync will take up to a couple of days to sync with the complete blockchain. It’s currently at 16GB! Once you see the upper left-hand box on the main screen say “SYNCED”, you can move forward.
Quit the program and hop over the File Manager. You’ll need a network share drive or a 32GB (or larger) thumb drive to move some files to your Raspberry. I just copy them to my NAS, which I can mount on the Raspberry.
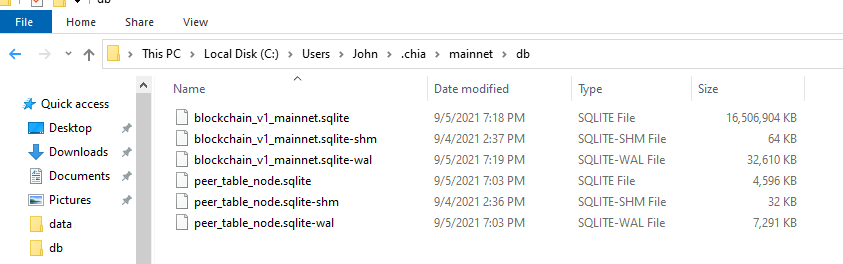
Quit the Chia program completely. The first thing you’ll want is the blockchain. You may need to turn on hidden files in Windows Explorer to find the .chia folder in your home. Navigate to C:\users\username\.chia\mainnet\db and find the 16GB database file. Copy it to your thumb drive or network share.
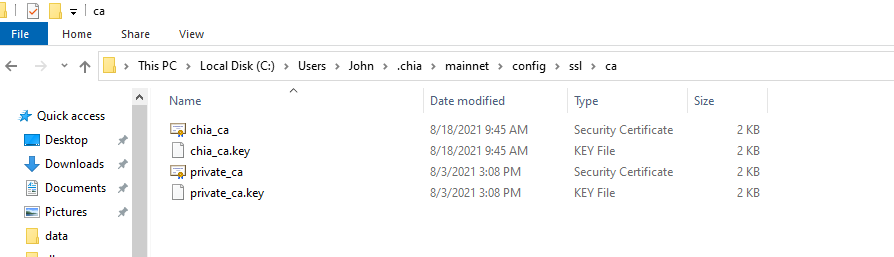
Next, we need a copy of the SSL keys. Browse to C:\users\username.chia\mainnet\config\ssl and copy the “ca” directory to the thumb/NAS drive.
Now, mount the thumb / NAS drive on the Raspberry. The files are going to a similar location on the Raspberry, in the “pi” user’s home. We’ll stop the chia program by hitting enter a couple of times and then running:
chia stop all
and move the sqlite file into place. blockchain_v1_mainnet.sqlite goes into /home/pi/.chia/mainnet/db, so copy that from the thumb drive to your Raspberry filesystem. If your Raspberry has already started creating it, just copy over it. This is the fastest way to get your harvester synced without waiting for days!
Next, the “ca” directory. It does not get copied. This Raspberry has its own keys in a ca directory. It was created when we ran “chia init”. What we do want to accomplish is to share the keys from the main node to this harvester so it can connect. Restart chia with the command “chia start all” and then add the main node keys. I have a shared copy of the ca directory on my NAS temporarily mounted on /mnt, so the command is:
chia init -c /mnt
The program will ingest these keys for later use. It will tell you “Found private CA in /home/pi/.chia/mainnet, using it to generate TLS certificates”. You can now remove the thumb drive / unmount the share. We’re done stealing files.
Attach the Plot Drive
I just found these on Amazon: UGREEN SATA to USB 3.0 Adapter Cable. They are perfect for a PI because they’re powered and support up to 12TB drives! Take your plot drive out of the SATA dock (once it’s full of plots) and attach it to this adapter and plug the adapter into one of the blue USB 3.0 ports on the Raspberry. Create a directory on the pi called “/plots” and mount the hard drive to it. You might need to run lsblk to find your device. Here’s mine, showing up as /dev/sdb. Run blkid to grab the unique partition id and create a mount in /etc/fstab.
rroot@pi4-1:~# lsblk
NAME   MAJ:MIN RM  SIZE RO TYPE MOUNTPOINT
sda      8:0    1 14.3G  0 disk
├─sda1   8:1    1  256M  0 part /boot
└─sda2   8:2    1 14.1G  0 part /
sdb      8:16   0  7.3T  0 disk
└─sdb1   8:17   0  7.3T  0 part

root@pi4-1:~# blkid
/dev/sda1: LABEL_FATBOOT="boot" LABEL="boot" UUID="71DB-60DA" TYPE="vfat" PARTUUID="5a2a450c-01"
/dev/sda2: LABEL="rootfs" UUID="1d91ff59-94c1-4271-a4d5-fdf142647058" TYPE="ext4" PARTUUID="5a2a450c-02"
/dev/sdb1: LABEL="8GB" UUID="D855-39BA" TYPE="exfat" PTTYPE="atari" PARTLABEL="Basic data partition" PARTUUID="7e8c9d6d-6fee-4ce2-9d76-b8943285eb91"

root@pi4-1:~# cat /etc/fstab
proc            /proc           proc    defaults          0       0
PARTUUID=5a2a450c-01  /boot           vfat    defaults          0       2
PARTUUID=5a2a450c-02  /               ext4    defaults,noatime  0       1
PARTUUID=7e8c9d6d-6fee-4ce2-9d76-b8943285eb91   /plots          exfat   defaults        0       0
You can see the edits in the last line of /etc/fstab where I’ve added my external drive. Yes, it’s got an exfat filesystem on it. I’ve been formatting my drives in Windows with exfat, if I know that they’re getting moved to the Raspberry farm. It works as well as ntfs, but doesn’t have as much overhead. Give it a try!
“mount -a” and you should see your plot drive online!
Connect Your Harvester to Your Farm
Let’s stop the program again to configure it as just a harvester. You’ll need the IP address of your Windows farmer. Enter the following commands:
chia stop all
chia configure --set-farmer-peer windows.farmer.IP.address:8447
chia configure --enable-upnp false
chia plots add -d /plots
chia start harvester -r
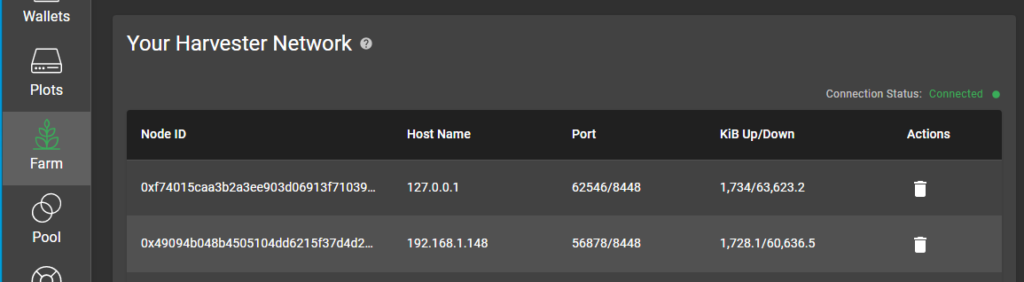
AND you’re up and running. You can check on the main node, if you click the “Farm” tab, scroll to the bottom, open “Show Advanced Options”, scroll down to your Harvester Network. You should see the IP address of your Raspberry Harvester!
Another “harvester command” that I like to run to ensure everything is kosher is to run”
chia plots check
It will do just that, first finding all the plots in the attached drive and then ensuring that they’re reachable, formatted with keys that you own, and that the whole setup is fast enough to react if you are asked to validate a found coin in one of your plots!
Errors?
chia command not found? Don’t forget to get back into the python environment before trying to run the chia command:
pi@pi4-1:~ $ chia
-bash: chia: command not found
pi@pi4-1:~ $ ls
chia-blockchain
pi@pi4-1:~ $ cd chia-blockchain/
pi@pi4-1:~/chia-blockchain $ . ./activate
(venv) pi@pi4-1:~/chia-blockchain $ chia stop all
Another issue that I see is that sometimes the start and stop commands don’t do their thing. You might need to do a “ps -ef” and then “kill -9” the stuck processes.
That’s it!
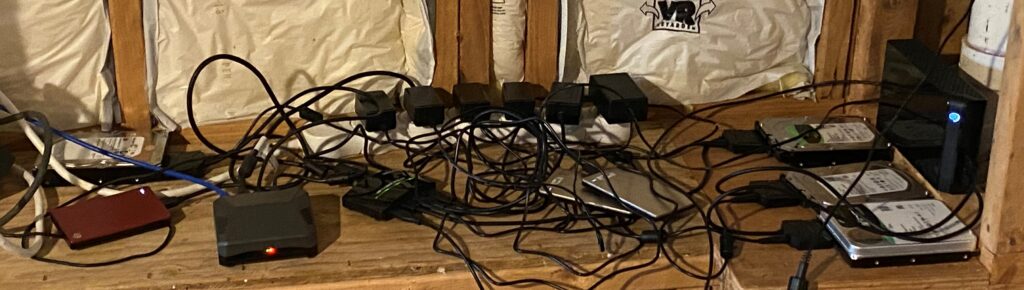
So, you’re successfully harvesting! Keep filling hard drives with plots and moving them over to your Raspberry Pi. With USB hubs and keeping those drives externally powered, you should be able to attach 32 devices to your Universal Serial Bus, your mileage may vary. Just add the drive UUID to fstab, with a new mount point, and don’t forget to tell the harvester where to find it with the “chia plots add -d /plots” command.