My Raspberry Pi PICO finally came! I’ve been studying the Getting Started Guide for days. I soldered on a couple of header strips and plopped it onto a breadboard. I wanted to explore using the GPIO since my last project involving GPIO failed miserably.
To get the PICO running MicroPython, you need to install it to the PICO and then install something like THONNY on your PC. Thonny is already available in the Programming section of the Raspberry Pi Desktop, but I want to be able to work on my laptop while tinkering with the PICO.
Plug a micro-USB cable into the USB port on the PICO. Hold the BOOTSEL button down and plug the USB cable into your computer. It should appear as an external drive as if you had just plugged in a thumb drive. Browse to the new drive and click on the HTML file that you see. It will take you to raspberrypi.com’s microcontroller page. Click on the MicroPython box and then follow the directions to download the uf2 installer file. Once it has completed downloading, drag and drop it to the PICO “drive”. The file will transfer and the PICO will reboot! Cool.
How to run Thonny on a PC for PICO
Next, browse over to thonny.org and download the development environment for your OS. The links are right on the top of the page. Install the download by clicking next a couple of times and checking the box to create a desktop icon.
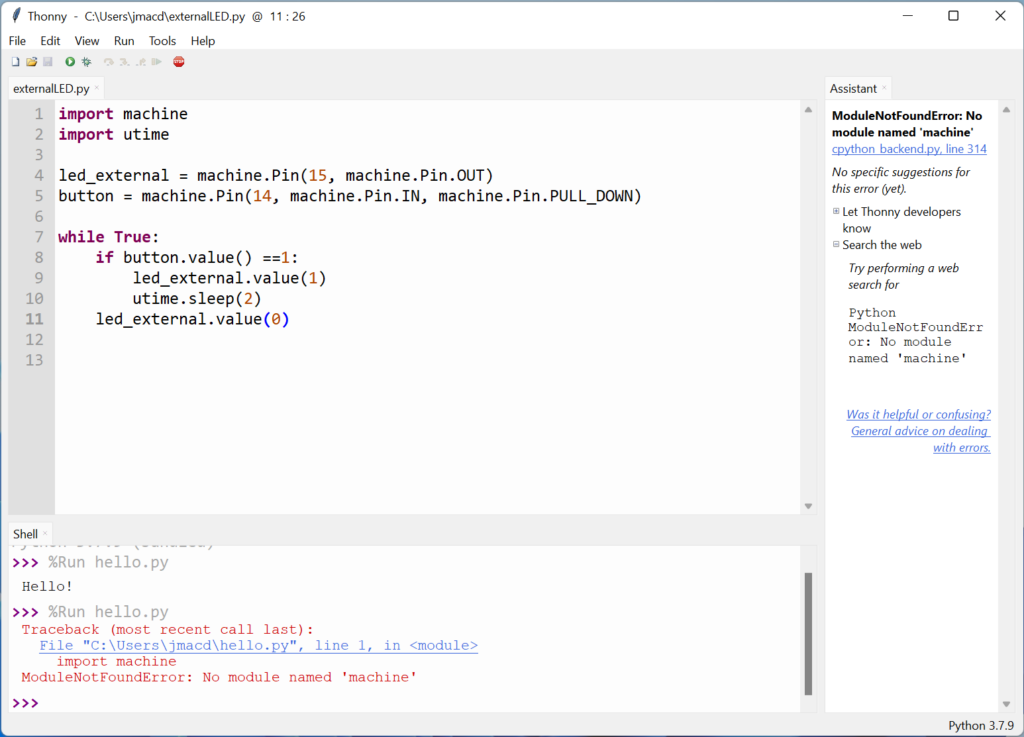
Run thonny and type in your program. I just want to use a button to control an LED. That should be a good proof of concept that I can program IN and OUT. I put a button on pin 14 and a LED on pin 15. Here’s the program (on the left) and the result (on the right).

Why doesn’t my PICO run my program? I didn’t tell Thonny to run this little program on the PICO! In the very bottom-right corner is the name of the interpreter. Click on it and choose your PICO so it looks like this:

Yay! NOW, it works. I can control the LED with the switch. On to some real programming!!