Now that we’ve got Proxmox running on the Raspberry Pi 4, let’s take a little look around. Once you’re logged in, let’s explore the “Datacenter” in the upper left. This is a listing of all the Pis in the cluster. We haven’t clustered yet, so there is just this one.
Click on Summary in the second column. Slide down in the right pane and we’re reminded that we’re not clustered, but we start to see some info about our Raspberry Pi. This page is more interesting once we get the cluster set up, but we can get a glimpse into the resource management going on.
To see more details about this server, click on the node in the far left column and then “Summary” in the second column.
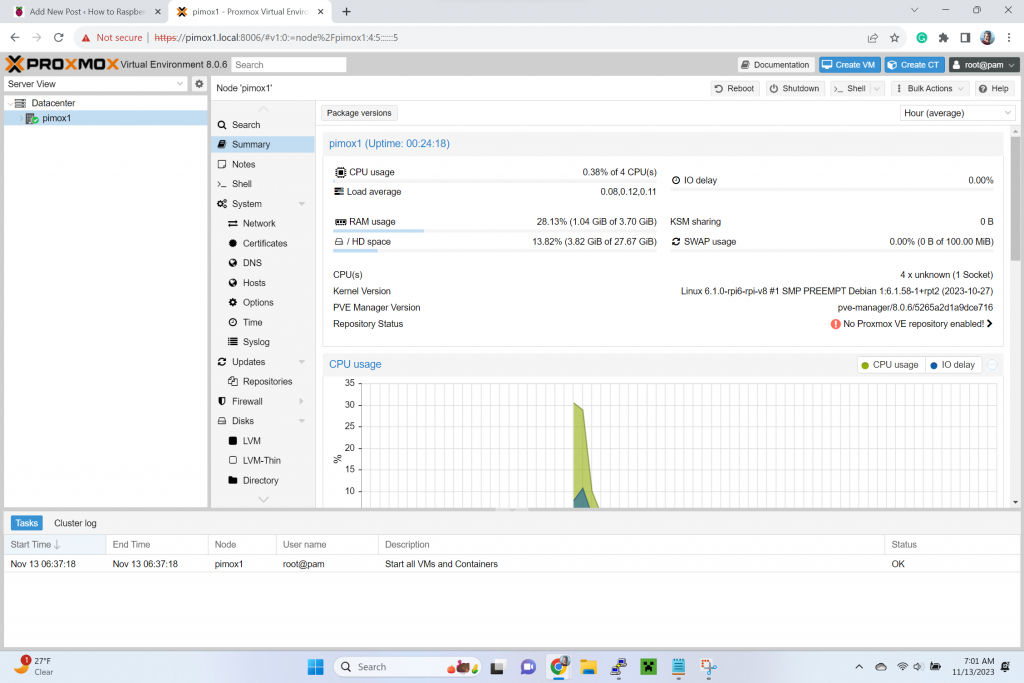
Looks like a Pi to me! Let’s set up a virtual machine! Now, keep in mind. We’re still on a Pi, so we need to find an ISO of an operating system that’s for ARM-based computers. A little googling and we should be able to find some candidates for our new VMs. Let’s play it safe and grab a copy of Debian. You can upload it right to the platform. We’ve got limited space on these thumb drives, so let’s set up NFS.
Click on Datacenter in the left column, and then Storage in the second column. You’ll see the local filesystem. Just above that “local” definition is a button “Add”. Click that and choose “NFS” from the pulldown. You’ll get the dialog to choose your NFS share. Enter a name that you’d like to call your ISO storage, and the name of the server, and use the pulldown in the third box to choose the share where you’re going to keep your ARM-based ISOs. Finally, in the fourth box, unselect Disk Images and select ISO image.

It might take a second for the Export box to populate, while Proxmox reaches out for your nfs server. Once you’ve made your choices, hit the Add button and wait for the new storage to appear in the Datacenter list. We do this at the Datacenter level because these settings will be available to all the nodes in your cluster.
Now, click the arrow next to your Proxmox node in the left column. When it opens up that node’s resources, you can see the network, the local storage (the USB drive in the Raspberry) and the nfs share that we just attached. Click the nfs share. You should see something similar to mine:
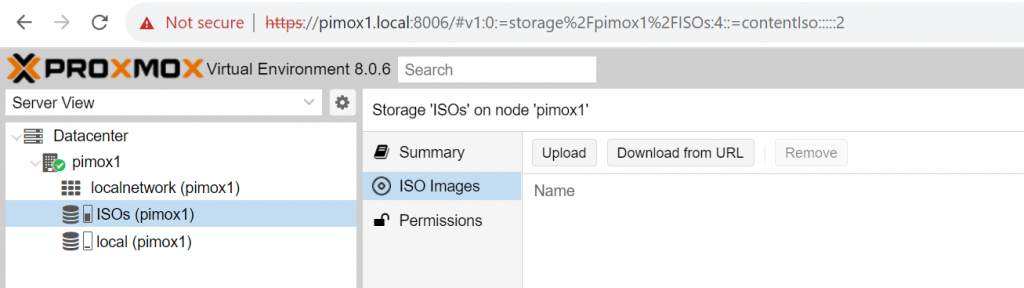
If you have already downloaded the ARM-based ISO you want to use, you can use the Upload button and copy it to your NFS. If you already stored that ISO in the share, skip ahead! Otherwise, let’s Download from the URL and pull the ISO from the website directly into our fledgling Datacenter. I googled “arm-based Debian installation ISOs” and found https://cdimage.debian.org/debian-cd/current/arm64/iso-dvd/
At the bottom of the page, I could right-click on the ISO file listed there and save the address to paste into Proxmox. Click the Query URL button to get Proxmox to fill in the File name:
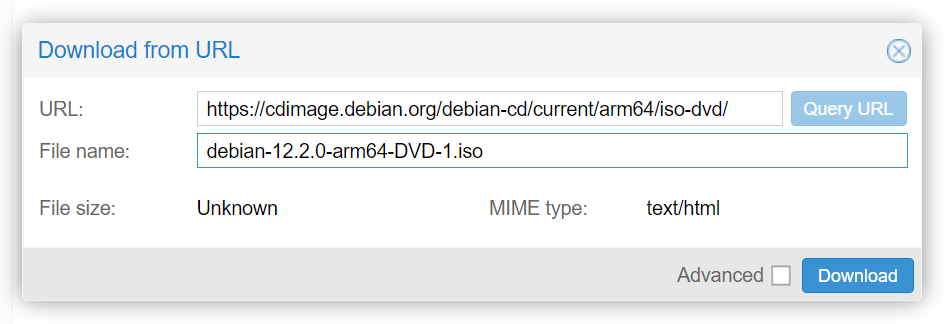
From there, just hit the Download button to add the ISO to your library on NFS. Now, in the upper right corner, you can hit Create VM or Create CT. You’ll decide what works better for your VMs. Do a little research and you’ll find lots of conflicting options on the Internet about what works better and why. I pretty much stick to VMs, unless I can find someone who’s posted an LCX template that simplifies a lot of complicated installs with a lot of dependencies. It’s your server!
Firstly, we’ll need a network to attach our VMs to. Unfortunately, Proxmox doesn’t like NetworkManager, so we need to kill NetworkManager and set up networking by editing the file /etc/network/interfaces:
auto lo
iface lo inet loopback

iface eth0 inet manual

auto vmbr0
iface vmbr0 inet static
        address 192.168.1.26/24
        gateway 192.168.1.1
        bridge-ports eth0
        bridge-stp off
        bridge-fd 0
My IP address is 192.168.1.26/24. You’ll change that and the gateway to match your setup. Otherwise, the rest should work fine. We’re also creating a bridge here, which is how our VMs will attach to the rest of the network. Make your changes and reboot. Now that we have a network for our VM’s, let’s create one.