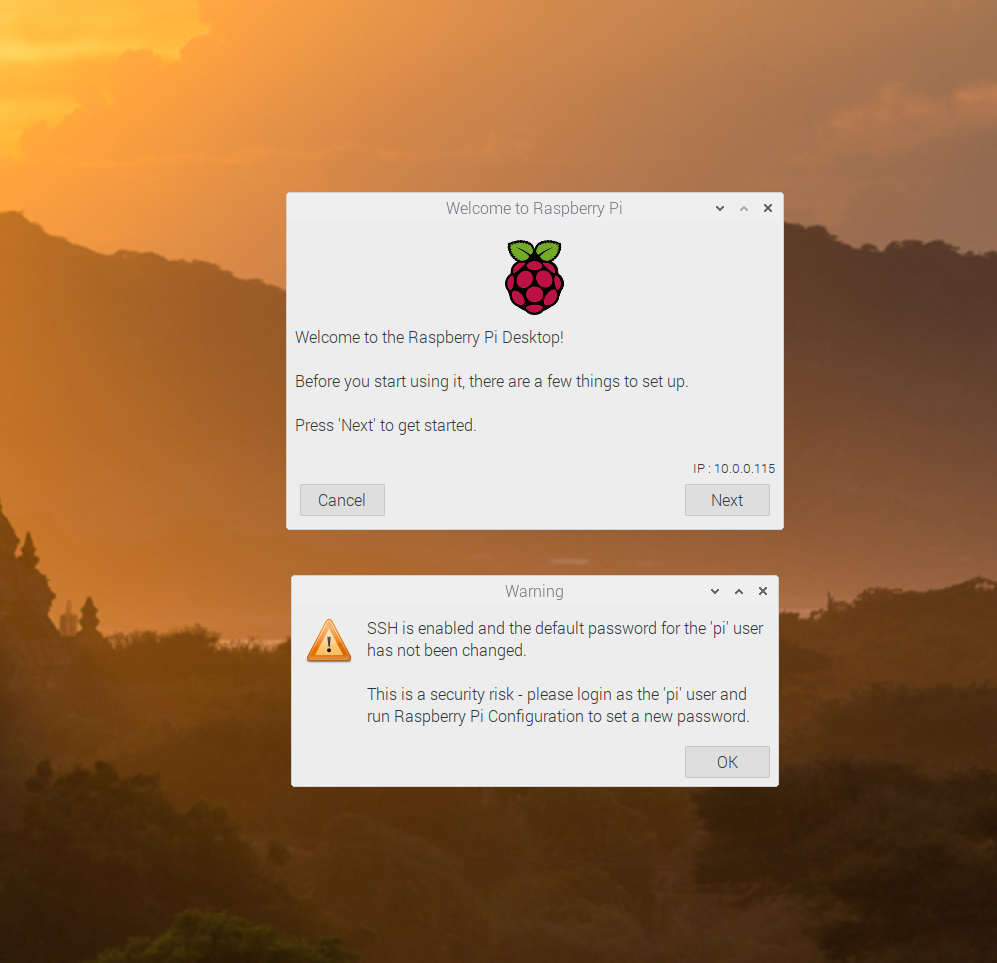
IF you have a monitor attached to the HDMI port of your Raspberry, you will soon to presented with an X-session! This is the windows-like interface that you can use to run your Pi. The first screen you see will have a warning that you haven’t changed the default password.

Click OK to acknowledge your lax security and then Next in the other box to walk through the guided set-up.

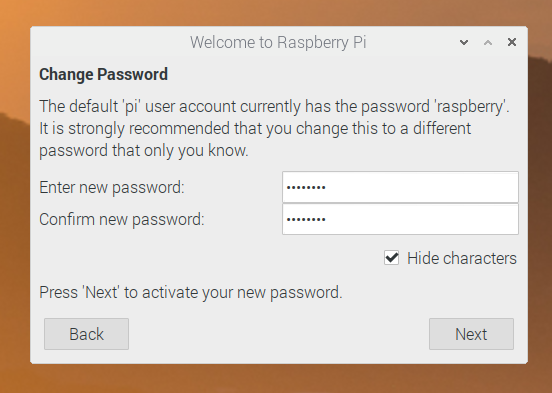
Go ahead and type in a more secure password than that default password “raspberry”. If you’re unsure of your typing skills, you can uncheck the “Hide characters” box to see what you’re doing. When you’re confident of your new password, click Next.

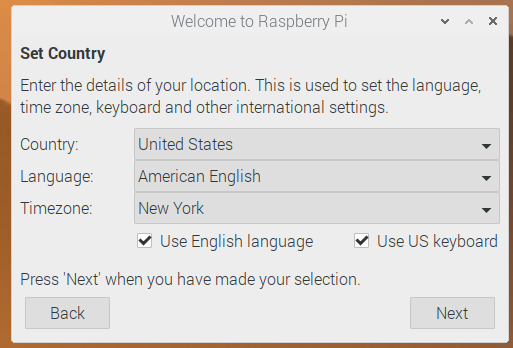
Next, we’re going to set up your locale settings. Here’s a picture of the setting I have chosen, yours may be different. Next.

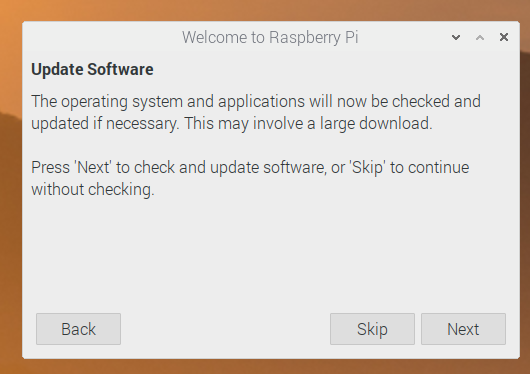
Finally, run a quick update. Well, not super quick. But, it IS quick to launch! Click Next and the system will update itself to the latest-and-greatest version of everything that is pre-installed. This may take up to half an hour, so go get a beverage!
When it’s done, reboot! Once the Raspberry comes back to life, you can begin exploring the menu in the upper-left-hand corner. Check out OpenOffice the MS-Office clone. Try browsing the web or maybe play some Raspbian games!
Have FUN!