With my recent success of setting up an m.2 drive on a Raspberry Pi, I thought I’d repurpose an old 3.5″ SATA drive. I jumped on amazon.com and found a GeeekPi SATA Expansion Board X825. You screw the hard drive to one side of it and mount the Raspberry Pi to the other.
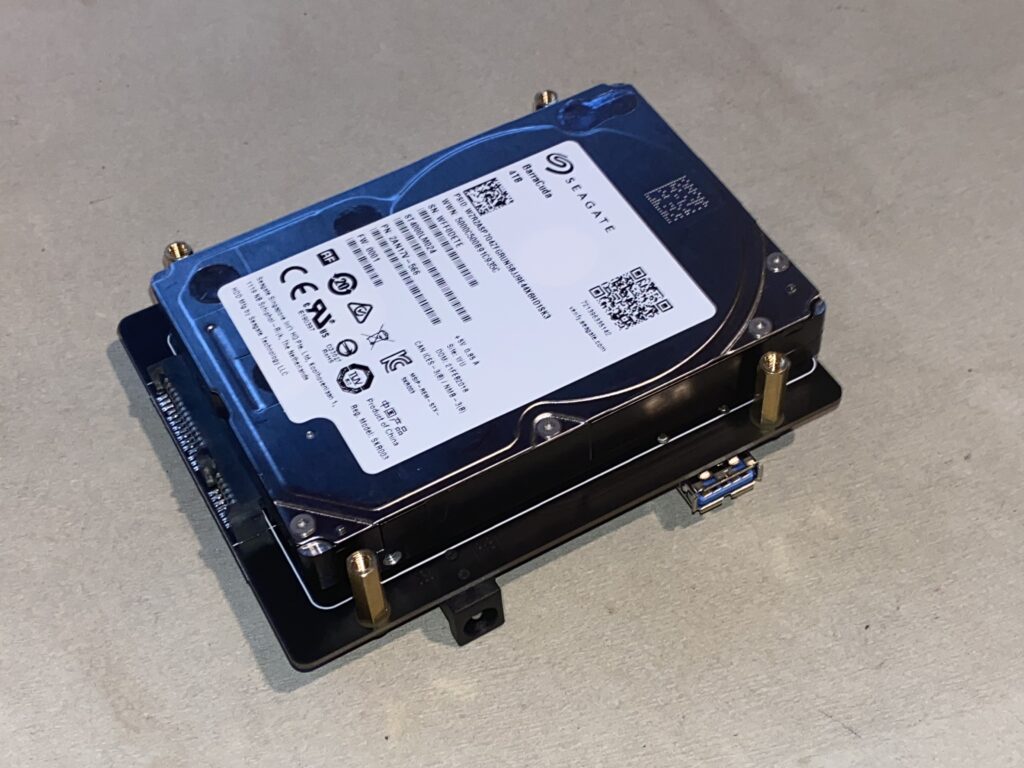
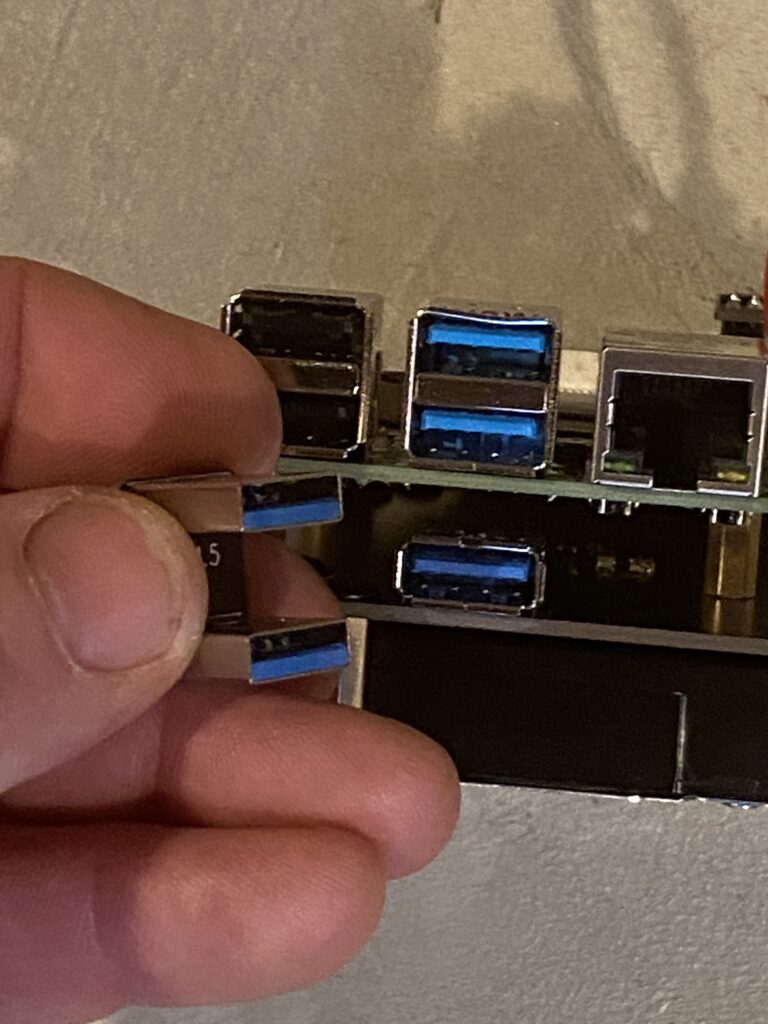
There’s a USB3 bridge to connect the USB ports of the two cards.
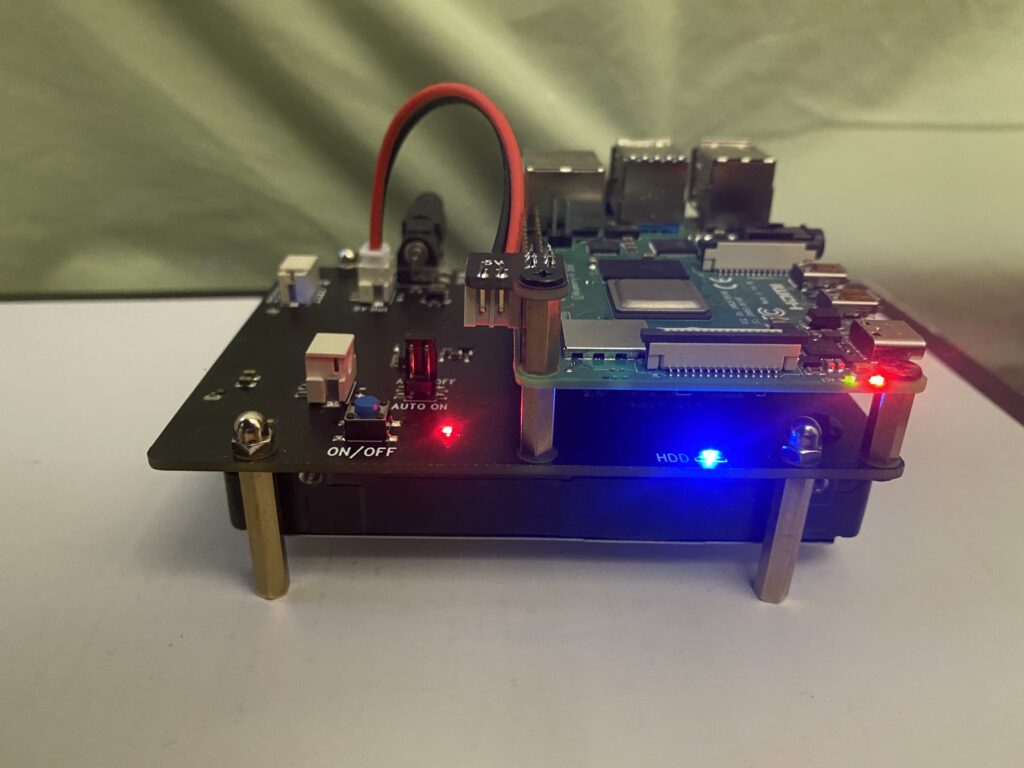
Then attach a jumper wire from the expansion board to +5v on the GPIO to power the Raspberry. Reading the specs, I decided to go ahead and purchase the 4A power supply as well, since the Raspberry would never be able to provide enough juice to the mechanical hard drive.
Boot It UP!
Prepare an SD card to boot from and apply power to the expansion board (not the USB-C on the Raspberry). Push the power button and the Raspberry springs to life. Once you get organized, changing passwords and timezones, do a lsblk and check for the hard drive:
root@nas:~# lsblk
NAME MAJ:MIN RM SIZE RO TYPE MOUNTPOINT
sda 8:0 0 3.7T 0 disk
└─sda1 8:1 0 3.7T 0 part
mmcblk0 179:0 0 14.9G 0 disk
├─mmcblk0p1 179:1 0 256M 0 part /boot
└─mmcblk0p2 179:2 0 14.6G 0 part /
It works! Now, what we need to do is partition the drive. We’ll create a 256M partition for /boot and we’ll create a second partition for the root file system comprised of the rest of the drive.
root@nas:~# parted
GNU Parted 3.2 Using /dev/sda
Welcome to GNU Parted! Type 'help' to view a list of commands. (parted) mklabel gpt
(parted) mkpart
Partition name? []? boot
File system type? [ext2]?fat32
Start? 1 End? 256M
(parted) mkpart
Partition name? []? root
File system type? [ext2]? ext4
Start? 256M
End? 100%
(parted) p
Model: ASMT 2115 (scsi)
Disk /dev/sda: 4001GB
Sector size (logical/physical): 512B/4096B
Partition Table: gpt
Disk Flags:
Number Start End Size File system Name Flags
1 4194kB 273MB 268MB fat32 Microsoft basic data msftdata
2 273MB 4001GB 4001GB ext4 Linux filesystem
(parted) q
Move Your Data
Next, we need to create file systems on the two partitions:
root@NAS:~# mkfs /dev/sdb1
mke2fs 1.44.5 (15-Dec-2018)
Creating filesystem with 248832 1k blocks and 62248 inodes
Filesystem UUID: 01df2433-a986-4358-b9a2-9062de0101c1
Superblock backups stored on blocks:
8193, 24577, 40961, 57345, 73729, 204801, 221185
Allocating group tables: done
Writing inode tables: done
Writing superblocks and filesystem accounting information: done
root@NAS:~# mkfs /dev/sdb2
...
Next, let’s rsync everything from /boot to our new boot partition on /dev/sda1. Then we’ll unmount and remount sda2 and copy all of / :
root@NAS:~# mount /dev/sda1 /mnt
root@NAS:~# rsync -avx /boot /mnt
root@NAS:~# umount /mnt
root@NAS:~# mount /dev/sda2 /mnt
root@NAS:~# rsync -avx / /mnt
(I’ve only shown the commands, not the standard output.)
Next, we’ll need to edit /boot/cmdline.txt ON THE HARD DRIVE, not on the SD card, so that when the system boots from /dev/sda1, it can find the root file system on /dev/sda2. Of course, you COULD just specify the location of the file system with those names, but no promises that everything will work if you ever put another peripheral in one of the other USB ports! Copy the PARTUUID for /dev/sda2 and paste it into /boot/cmdline.txt, replacing the UUID for the SD card:
root@NAS:~# blkid
/dev/sda1: LABEL_FATBOOT="boot" LABEL="boot" UUID="4AD7-B4D5" TYPE="vfat" PARTLABEL="Microsoft basic data" PARTUUID="c70c87e1-9461-4d4a-bca4-7ae79526fc11"
/dev/sda2: LABEL="rootfs" UUID="2887d26c-6ae7-449d-9701-c5a4018755b0" TYPE="ext4" PARTLABEL="Linux filesystem" PARTUUID="05b3b063-c450-4f96-b498-0acfdcc5b2c4"
root@NAS:/# mount /dev/sda1 /mnt
root@NAS:/# cd mnt
root@NAS:/mnt# vi cmdline.txt
console=serial0,115200 console=tty1 root=PARTUUID=05b3b063-c450-4f96-b498-0acfdcc5b2c4 rootfstype=ext4 elevator=deadline fsck.repair=yes rootwait
We’re also going to have to edit /etc/fstab. This determines what file systems are mounted and available on the system. /dev/sda1 is just /boot. /dev/sda2 is /, that is, the rest of the file system. So mount /
mount /dev/sda2 /mnt
and then edit the new working fstab in /mnt/etc/fstab. We’re going to use those same UUIDs in fstab:
proc /proc proc defaults 0 0
PARTUUID=c70c87e1-9461-4d4a-bca4-7ae79526fc11 /boot vfat defaults 0 2
PARTUUID=05b3b063-c450-4f96-b498-0acfdcc5b2c4 / ext4 defaults,noatime 0 1
Save your work. At this point, we should be ready to roll. The Raspberry Pi 4 will try to boot from SD. If there’s nothing in the SD card slot, it will go out to the USB ports, looking for a boot partition. If it finds one, it will use it. Since we just edited the cmdline in that partition, the boot process will ALSO find the / (root) file system and load up the operating system! Ready? Shutdown the Raspberry. Pull the power. Pull the SD card. Apply power. (Cross your fingers.) And wait a little longer than you’re used to. And if things go as planned, you should get a login prompt!
Winner, Winner, Chicken Dinner!
root@NAS:~# df -h
Filesystem Size Used Avail Use% Mounted on
/dev/root 3.6T 1.3G 3.5T 1% /
devtmpfs 1.8G 0 1.8G 0% /dev
tmpfs 1.9G 0 1.9G 0% /dev/shm
tmpfs 1.9G 8.5M 1.9G 1% /run
tmpfs 5.0M 4.0K 5.0M 1% /run/lock
tmpfs 1.9G 0 1.9G 0% /sys/fs/cgroup
/dev/sda1 253M 54M 199M 22% /boot
tmpfs 383M 0 383M 0% /run/user/0
root@NAS:~#
Yep! Check the size of that / partition! Lots of room! AND NO SD card to crash and foul things up! Definitely a win-win!
Thanks John!
Exactly what I was looking for (but for a a SSD disk). I did not finish yet, but I will have a few differences with your setup :
1) I created 2 more partitions: a swap partition, and a “data” one (/export in my case), from where I will bind-mount /tmp, /var, and /home, leaving root partition mostly read-only.
2) For rsync, I prefer to preserve hard links, for instance “rsync -avHx src dest”.