So, you finally got cacti running on your server and you want it to monitor your network devices! No problem! Getting cacti running as a webpage is the hard part. Setting it up to watch your whole network is the fun part!!
Browse to http://your cacti server IP address/cacti and you should get the console. A little daunting at first, but your persistence will pay off! cacti takes a somewhat object-oriented approach to network monitoring. First, we have to add devices. Then, to each of those devices, we need to define what it is that we want to monitor.
Add Devices to cacti
The initial screen is empty. Use the menu on the left-hand side to choose CREATE and then NEW DEVICE.
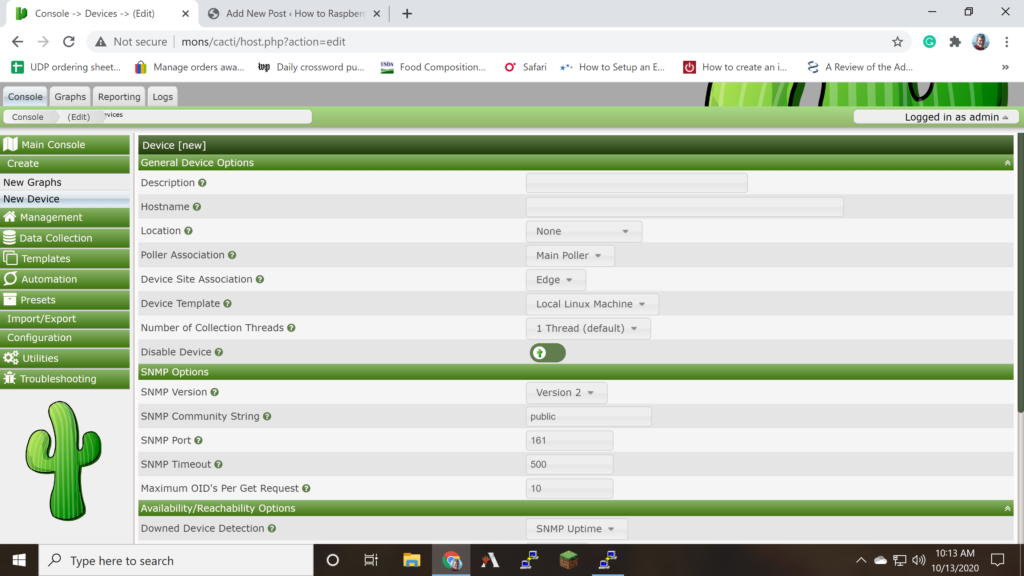
Fill in the first section:
- Description can be just about anything. “computer in the kitchen” or just “PC-kitch”. I’m using the hostname.
- For the Hostname, you can use the hostname (if you trust your local DNS) or, to be on the safe side, the IP address of the computer that you wish to monitor.
- Location is left alone, unless you’re monitoring multiple sites.
- Poller Association is left alone. We’re just using the default–that crontab one-liner that we set up.
- Device Site Association I don’t touch either.
- Device Template is important. This defines what graphs are going to be created for the device in cacti. I install net-snmp on all my devices, so I use the pull-down to choose that.
Second Section:
- SNMP version: you know better than I. I use 2c. Have you upgraded to the more secure v3?
- SNMP Community String: “public” is the default. Or have you edited /etc/snmp/snmpd.conf on each of your monitored devices?
- the rest of the defaults work great
Scroll to the bottom of the page and hit the SAVE in the lower right corner. Then wait for cacti to go and query the device. If all goes well, you should see some basic snmp data at the top of the page. I failed:
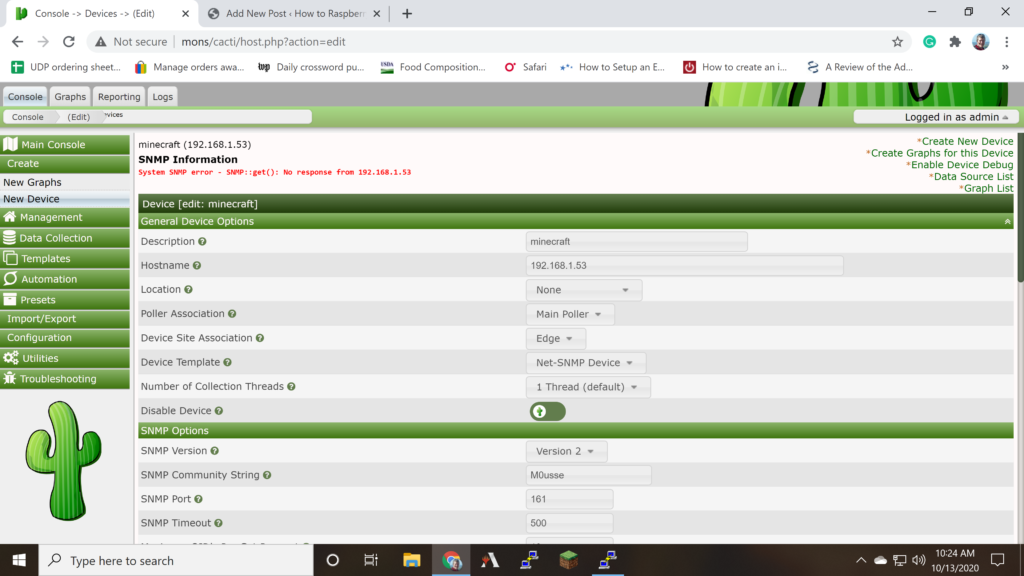
cacti could not communicate with my minecraft server. I probably didn’t install snmp on that device.
Yep, it was installed. It just needed a restart. Scroll down and click save again.
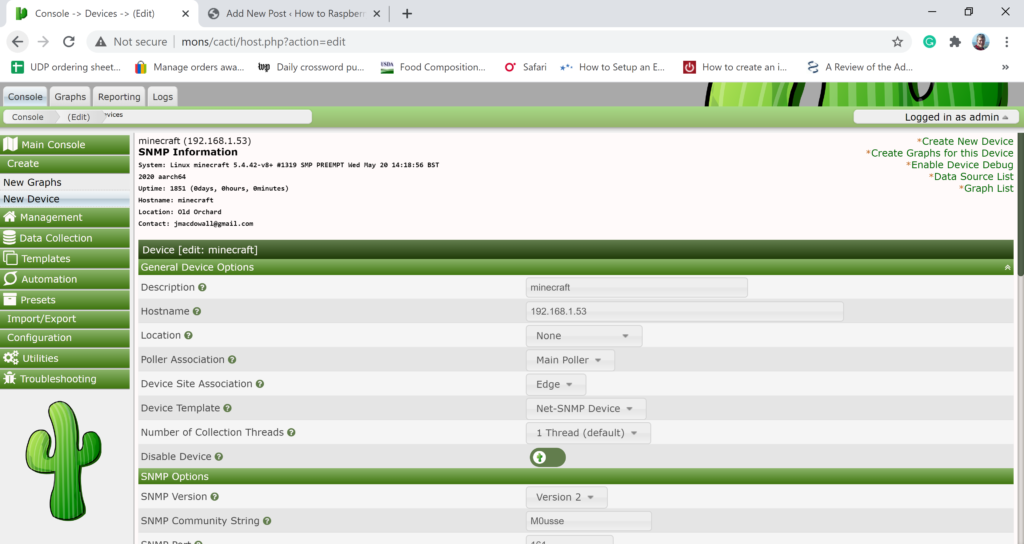
See the difference? SNMP Information has the basic information in it!! Yay! Next step?
Add New Graphs to cacti
Click in the top right hand corner: “Create graphs for this Device”. You’ll get a screen for all the available graphs. Check the graphs you’re interested in and scroll down to the bottom and click “save”

Wait 3 polling cycles. Remember that cronjob? Every 5 minutes? In 15 or so minutes, you’ll have some graphs! But where are they?!?! See the tabs in the upper left? Click Graphs, then the little histogram tab that appears on the top right. There’s the graphs! You’ll get an idea of what graphs work for you and what graphs are useless. Just for fun, create them all for one of your devices, let them chart data for a couple of hours (or days) and then go back and delete the ones that you don’t like/need/use. How? Easy:
Deleted Unwanted Graphs in cacti
Click the Console tab on the top left. Choose Management from the menu. Choose Graphs. You’ll get a long list of all your current graphs, sorted by hostname. Click the boxes to the right of the graphs you don’t want and then scroll to the bottom and use the action menu to choose delete and then hit the GO button next to it. The next screen wants to know if you want to delete all the data sources that were being used to generate those graphs. I always go with what cacti thinks. If it’s got “Leave intact” selected, it’s because those data sources are being used in another graph somewhere else. It’s usually right.
Setting the New Device Default
Once you get into the swing of adding new devices, you’re going to get into a pattern of what you change for each device in the Add New Device screen. Do yourself a favor and edit the defaults! Go to Console tab, Configuration menu, and then the Settings submenu. Choose the Device Defaults top tab. Look familiar? I change the Template to Net-SNMP Device and the Community string to my changed SNMP “password”. Scroll down and hit Save. Now, you only have to type in the Description and the Hostname when you add new devices!