Looking to remove one more speed bottleneck from your Raspberry Pi server? Me, too! That’s why I looked into SSD hard drive technology, specifically an M.2 drive, for my Raspberry Pi 4. The Pi4 has two USB3 sockets and I really wanted to take advantage of its interface speed. Those little blue sockets hold big secrets. Just take a look at how the speed has increased over the past few years!
USB Interface Speeds
| USB version | 1 | 2 | 3 | 3.1 | 3.2 | 4 |
| Introduction | 1996 | 2001 | 2011 | 2014 | 2017 | 2019 |
| Data rate | 1.5 Gb/s | 1.5 Gb/s | 5 Gb/s | 10 Gb/s | 20 Gb/s | 40 Gb/s |
Let’s see if we can get some better read / write times out of that USB3. I’m tired of looking at top and seeing the “wa” (hard drive waiting times) posting such high numbers!
Hardware Used in this Test
Geekworm X872 m.2 HAT A quick search on Amazon yielded this little device that lets me put a NAND gate drive on my Raspberry PI’s USB3 port. (Here is the updated part!)
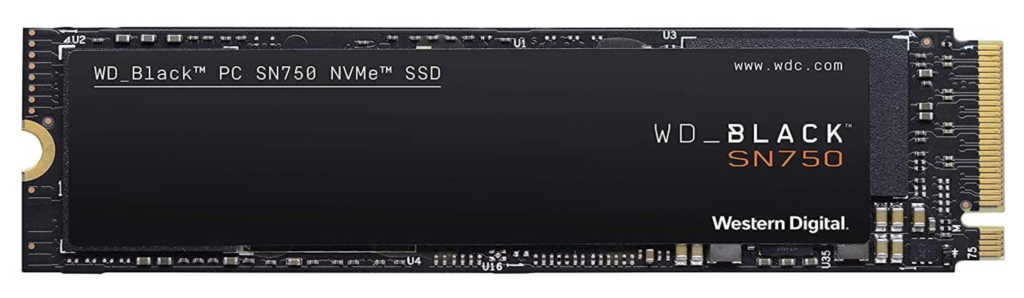
WD_Black SN750 250GB M.2 2280 format drive from Western Digital. Geekworm recommended not using a Samsung…
Raspberry Pi 4 Model B (4GB model )
SanDisk 32GB Ultra microSDHC I buy these 5 at a time.
SanDisk Cruzer Fit 8 GB USB Flash Drive (buy these IN a 5 pack)
Here’s the Geekworm kit. Basically you get a board to clip the M.2 drive to, some standoffs, the USB3 coupler, and a screwdriver.
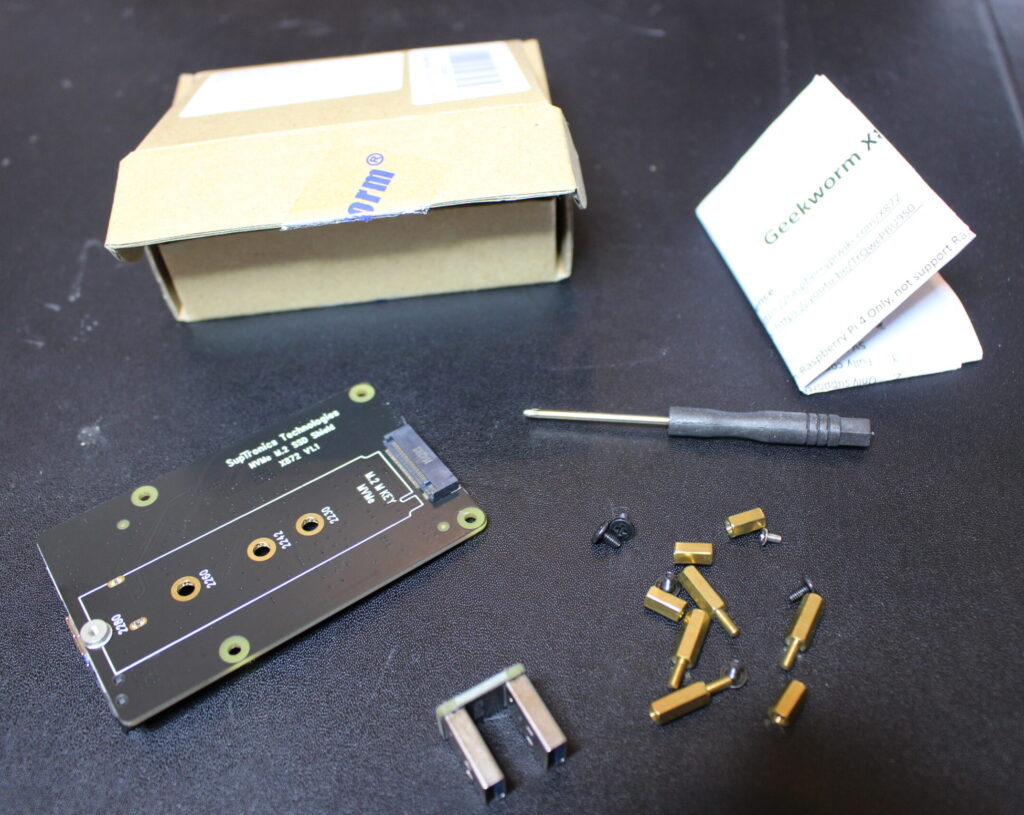
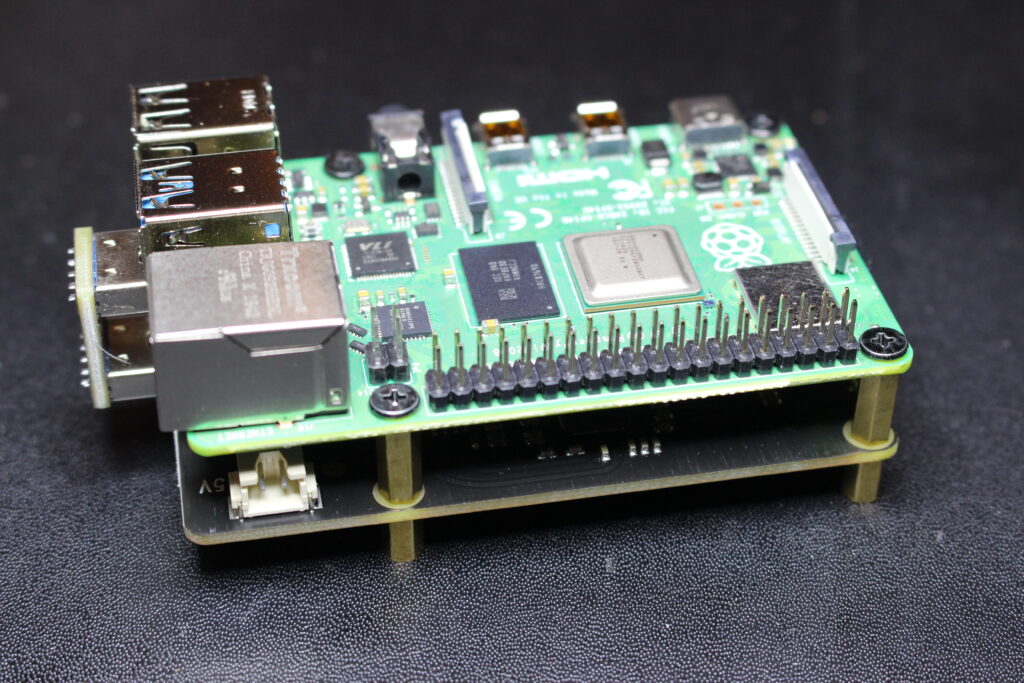
Assembly is simple. Use the standoffs to attach the boards and put the USB3 coupler in place. Slide the M.2 drive into place and use the flathead screw to hold it in place.
Boot Time!
Boot it up and let’s see if it works:
root@node4-0:~# lsblk
NAME MAJ:MIN RM SIZE RO TYPE MOUNTPOINT
sda 8:0 0 232.9G 0 disk
└─sda1 8:1 0 232.9G 0 part /m2
sdb 8:16 1 7.5G 0 disk
└─sdb1 8:17 1 7.5G 0 part /thumb
mmcblk0 179:0 0 29.7G 0 disk
├─mmcblk0p1 179:1 0 256M 0 part /boot
└─mmcblk0p2 179:2 0 29.5G 0 part /
Ahhh! It’s so nice when things work the first time! sda is the M.2 drive on the Geekworm board. sdb is a Sandisk 8Gb thumb drive. mmcblk0 is the SD card.
Here’s a different view:
root@node4-0:~# lsusb
Bus 002 Device 002: ID 152d:0562 JMicron Technology Corp. / JMicron USA Technology Corp.
Bus 002 Device 001: ID 1d6b:0003 Linux Foundation 3.0 root hub
Bus 001 Device 003: ID 0781:5571 SanDisk Corp. Cruzer Fit
Bus 001 Device 002: ID 2109:3431 VIA Labs, Inc. Hub
Bus 001 Device 001: ID 1d6b:0002 Linux Foundation 2.0 root hub
root@node4-0:~#
Here you can see the M.2 interface board, the thumb drive and SD card. Let’s see if we can partition the M.2 drive. I’ve been using parted. I like it because you can tell 100% for the end of the partition to use the whole drive. I hate trying to figure out the math.
M.2 drive Configuration
root@node4-0:~# parted
GNU Parted 3.2
Using /dev/sda
Welcome to GNU Parted! Type 'help' to view a list of commands.
(parted) mklabel gpt
(parted) mkpart
Partition name? []? m2
File system type? [ext2]? ext4
Start? 1
End? 100%
(parted) quit
Information: You may need to update /etc/fstab.
root@node4-0:~# mkfs /dev/sda1
mke2fs 1.44.5 (15-Dec-2018)
Creating filesystem with 61049344 4k blocks and 15269888 inodes
Filesystem UUID: 341e5082-773e-4ee6-b6e4-41a80c304ac5
Superblock backups stored on blocks:
32768, 98304, 163840, 229376, 294912, 819200, 884736, 1605632, 2654208,
4096000, 7962624, 11239424, 20480000, 23887872
Allocating group tables: done
Writing inode tables: done
Writing superblocks and filesystem accounting information: done
Mount it and check it:
root@node4-0:~# mount /dev/sda1 /mnt
root@node4-0:~# df -h
Filesystem Size Used Avail Use% Mounted on
/dev/root 29G 3.1G 25G 12% /
devtmpfs 1.8G 0 1.8G 0% /dev
tmpfs 1.9G 20K 1.9G 1% /dev/shm
tmpfs 1.9G 492K 1.9G 1% /run
tmpfs 5.0M 4.0K 5.0M 1% /run/lock
tmpfs 1.9G 0 1.9G 0% /sys/fs/cgroup
/dev/mmcblk0p1 253M 54M 199M 22% /boot
tmpfs 380M 0 380M 0% /run/user/1000
tmpfs 380M 0 380M 0% /run/user/0
/dev/sda1 230G 60M 218G 1% /mnt
Speed Testing
OK. It really works! I’m dying to speed test this thing in comparison to the SD card and the thumb drive. Let’s set up three directories, each one on a different media:
root@node4-0:~# mkdir /m2
root@node4-0:~# mkdir /thumb
root@node4-0:~# mkdir /sdcard
root@node4-0:~# mount /dev/sda1 /m2
root@node4-0:~# mount /dev/sdb1 /thumb
Let’s use dd’s “direct mode” to test the three mounted media. I mounted the M.2 drive to /m2. I mounted the thumb drive to /thumb and the SD card is the root drive, so I just created a directory “/sdcard” to represent the SD card. I’ll issue a dd to copy from the zero “device” to each of the mount points. The combination of command line arguments will create a 2GB file on each device and we can analyze the results in the dd standard out.
First the SD card:
root@node4-0:~# dd if=/dev/zero of=/sdcard/2G_test_file.txt oflag=direct bs=128k count=16k
16384+0 records in
16384+0 records out
2147483648 bytes (2.1 GB, 2.0 GiB) copied, 170.724 s, 12.6 MB/s
That last number, 12.6 MB/s is our baseline. Nothing to write home about. Next, the thumb drive:
root@node4-0:~# dd if=/dev/zero of=/thumb/2G_test_file.txt oflag=direct bs=128k count=16k 16384+0 records in 16384+0 records out 2147483648 bytes (2.1 GB, 2.0 GiB) copied, 596.521 s, 3.6 MB/s
3.6 MB/s!?!? We’re going in the wrong direction. Actually, this is no surprise. I always tell people that you trade speed for reliability when you go from SD card to thumb drive. Finally, let’s hit our fancy new M.2:
root@node4-0:~# dd if=/dev/zero of=/m2/2G_test_file.txt oflag=direct bs=128k count=16k
16384+0 records in
16384+0 records out
2147483648 bytes (2.1 GB, 2.0 GiB) copied, 16.4942 s, 130 MB/s
root@node4-0:~#
The Big Winner
130MB/s! Hell, yeah! That’s what I’m talking about! Thanks, Geekworm! Awesome product! Time to get my Minecraft world file copied over to my new drive!!
Update: 6/4/21 = Better Way!
There’s a better way to do this!! I’m working on rebuilding this Raspberry and was having trouble booting with a freshly imaged USB drive. Then, when I tried booting from SD, the m.2 wasn’t always appearing. So, I pulled the m.2 sled off, plugged in the USB U-shaped connector and plugged a USB extension cable into that and then plugged that into my computer and imaged the whole thing with balena Etcher. Put the Raspberry back together and it booted right up! No transfering files, boot partitions, and waiting for the USB bus to setting so the damn thing would boot!
Did you ever try a speed test with a USB 3.1 thumb drive?
Thanks for the How To. The instructions worked perfectly. The test results were similar. 15.8MB/s for my SD card (SanDisk) and 104MB/s for WD Blue SN550 500GB NVME. Nice!
Excellent! Thanks for the feedback. I’m actually in the process of rebuild my m.2 hosting server that WAS running Minecraft to be a Chia Coin farmer. Hopefully, it can crank out lotsa’ plots to NAS for testing by the rack of Pi4 harvesters.
Thank you very much for the article!
I’m a noob so if you could help me from ground up (summarize the ‘fix’ in a small doc), I’d be very grateful.
I’m looking to install an m2, boot from it and use instead of the microSD.
Thank you! David
I have a couple of posts about m.2 drives. Search for m.2 in the search box on the right and then read through them. The Argon One build post shows how I image the drive.
What steps have you taken so far?
Thanks
I have purchased the Argon drive, installed an M2 SATA.
I’m running Stellarium…
Got it up and running just have to learn how to create the image of my current OS image, transfer it to the SSD, remove the microSD and pray it all works ?
DD
You might try using the “Clone drive” feature of BalenaEtcher, with your SD as the source and the m.2 as the destination.
hi
I installed a SAMSUNG 970 EVO Plus (500GB) on a RasPi4/4GB the following way:
I updated the bootloader with an procedure from Raspi.org with a SDcard
I loaded Raspian bullseye with raspi loader directly to the ssd attached at the Geekworm X.873/V1.2
and expanded the file system with raspi-config.
everything runs ok (booted slowly), but the ssd gets HOT!
cooling it with a discrete ssd heatsink does not work well. still burned my fingers
so I installed an ssd cooler with a small fan.
unfortunately I could NOT read any SMART information with smartmontools
It seems that the firmware of the X.873 does not give access to the info
Great article, well written with photos too! Thanks for taking the time to do the write up. I’m now playing with a Raspberry Pi model 1B and looking at better options than an SD card for booting and storage. Aside from being slow, a full-size SD card adaptor makes fitting it into a small Raspberry housing enclosure tricky. Why on earth didn’t Raspberry just put a neater microSD card slot on them instead of the full-size SD card slot?! It would have made a lot more sense and not mean having SD card sticking out the end of enclosures!
SSD drive costs have fallen considerably in recent years. You can pick them up refurbished or new open box very cheap on eBay or in the used phone and gadget type stores on the highstreet so I’ll probably follow this article and take that approach. It makes more sense using an M2 SSD rather using an external USB magnetic hard disk or ATA SSD approach since:
1. It leaves the USB port free.
2. M1 and M2 Solid state disks are usually massively faster.
3. Much more practical size it can fit inside an exclosure with the Raspberry.
4. Hardly any heat and no noise generated. No fan needed.
In my electronics ‘junk box’ I recently discovered a tiny 1.8″ 3V 500mA 80GB Toshiba (MK8007GAH) magnetic disk drives salvaged from an old broken laptop I thought might be worth pairing up with my Raspberry.
You can pick the 1.8″ tiny hard disks up very cheap now on eBay. They were used in ipod’s and earlier slim laptops before solid state disks arrived. They use the EIDE Ultra ATA100 44-pin interface and can move data at up to 100MBps. Nowhere as fast as a SSD, but still a hell of a lot faster than an SD cards or USB flash drive…and they’re low energy draw and small enough to fit inside many small Raspberry Pi enclosures.
I’m trying to figure out how to connect my Toshiba 1.8″ disk drive to my Raspberry Pi 1B. I have a couple of CF-to-USB adaptors which look like that may be suitable since these adaptors have 44-pin sockets on them and the disk drive has 44 pins but perhaps I’m mistaken and the adaptors are only suitable for CF? Even if these CF adaptors work with the drive because they use a USB port it would reduce the disk speed significantly, so not make much sense I guess connecting one to a Raspberry that way.
I wonder if one of these disks could be connected *directly* to the Raspberry via the GPIO pins with a special cable? Or even into the SD card socket with some special hard disk to SD socket cable adaptor assuming something like that exists?
If anyone has successfully directly connected a 1.8″ disk drive onto a Raspberry I’d love to know how its done, and whether its possible to boot directly off it, or would you still need an SD card for booting?