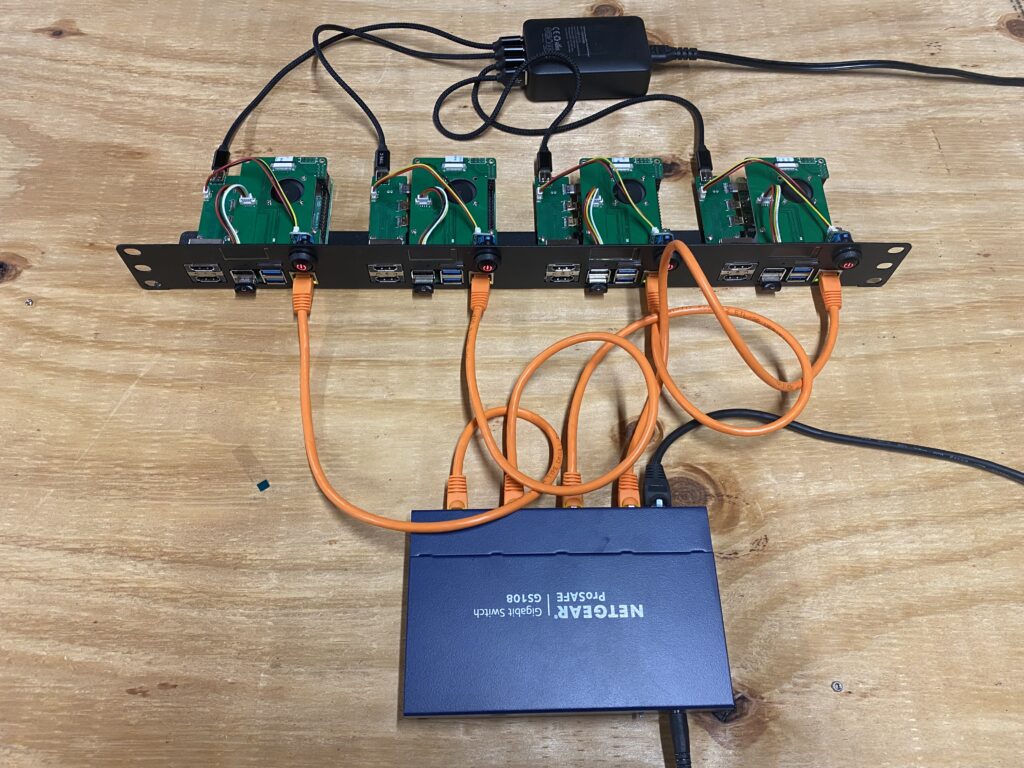
I wanted to get a couple of my Pis out of the experiment sandbox and permanently on the network. I’ve got a salt server, a pi-hole, a transmission server, and my cacti monitoring server. The configs are all backed up and they can be salted back to life but I didn’t want to run the risk of accidentally rebuilding one of them in my zeal to try a new Raspberry build so I decided to rack-mount them. I just got a new StarTech 8U Wall Mount rack and was excited to put something cool in it (beyond the Ubiquiti gear) so I went with this rack from UCTRONICS.
I didn’t realize the amount of assembly required, but it was actually quite a fun build! Nothing difficult, but nimble fingers were required. When I first cut the box open, I was happy to see everything neatly packed in its own anti-static bags. Some of the fan mount nuts weren’t tighten so they were loose in the bags. Thank Goodness for the single-serve bags.
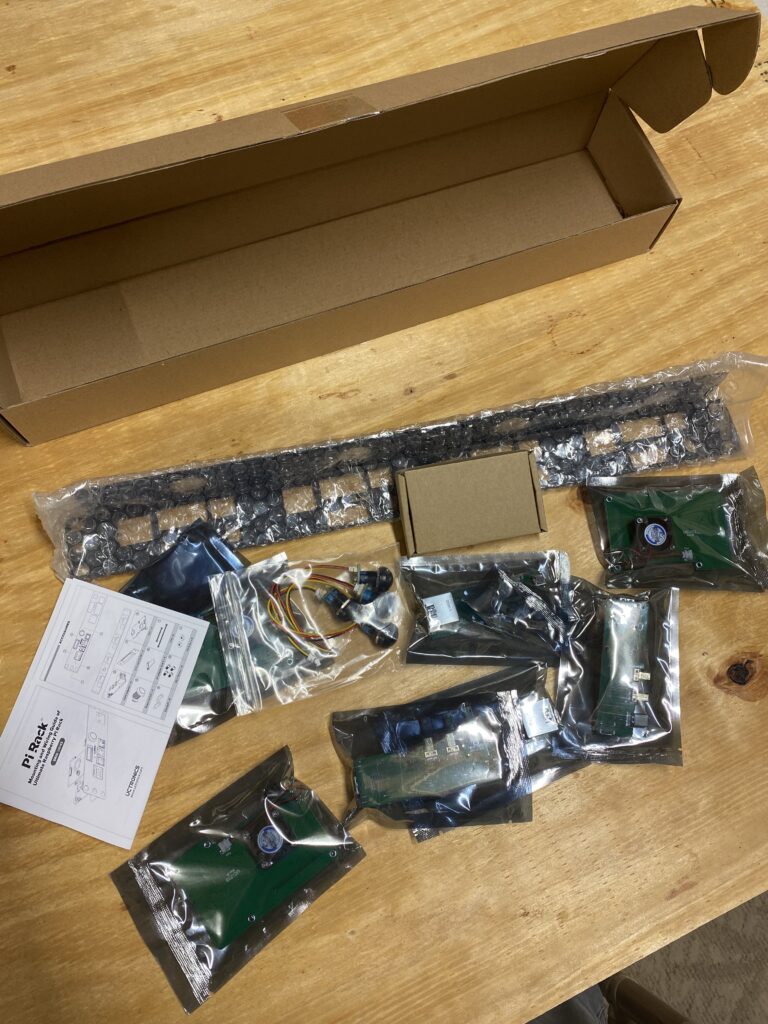
Once I got everything ripped open and readied for assembly, I decided to go with 4 brand-new Raspberries, thus giving me an excuse to rebuild the “servers” from scratch and made sure I had good, clean builds. So, I ordered 4x 4GB RaspPi 4s and then formatted, tested, and imaged 4 USB drives. Any excuse to buy MORE RASPBERRIES is a good one.
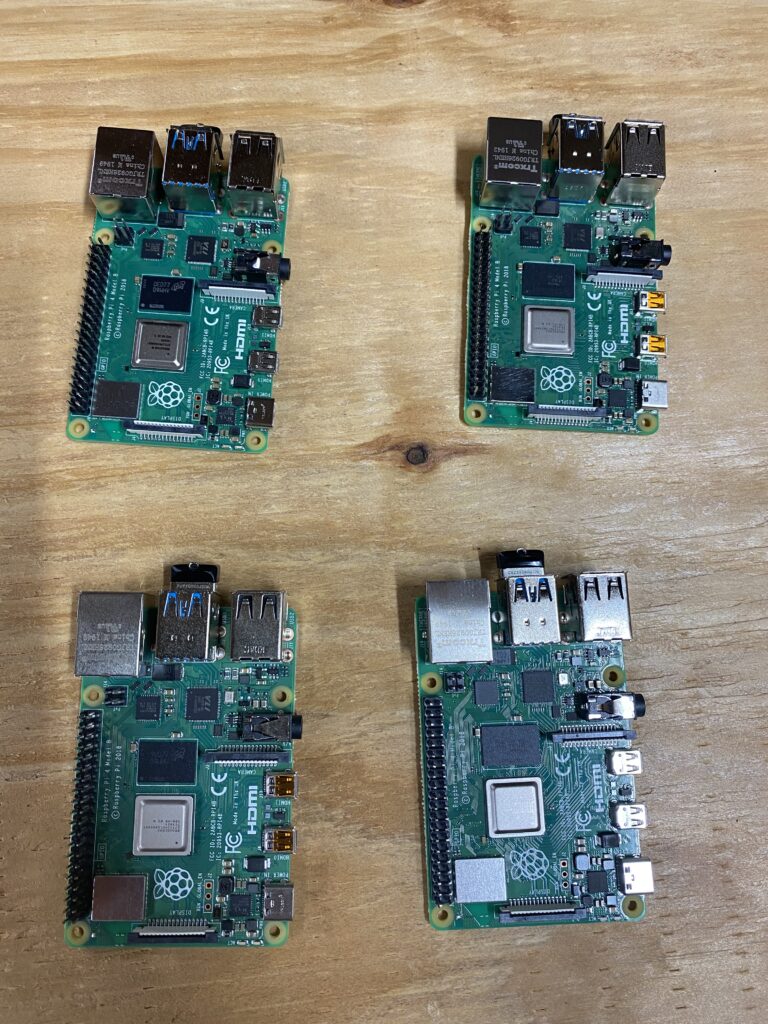
Once I got my parts sorted, I decided to do the build assembly-line fashion, doing each step 4 times. In retrospect, I think I would have done each Raspberry start-to-end. This would have allowed me to learn from my mistakes and then go back and make corrections to earlier steps without having to do a teardown. None the less, it was all fun.

The first step was to put the port redirector in place and mount the assembly to the rack. The connectors aligned perfectly and the mount posts were perfectly placed. I had to jiggle the Raspberry around a little to get the USB ports to go through the rack face, but was pleasantly surprised at the appearance once properly inserted. Two nylon posts hold the Raspberry and provide screw points for the next step.
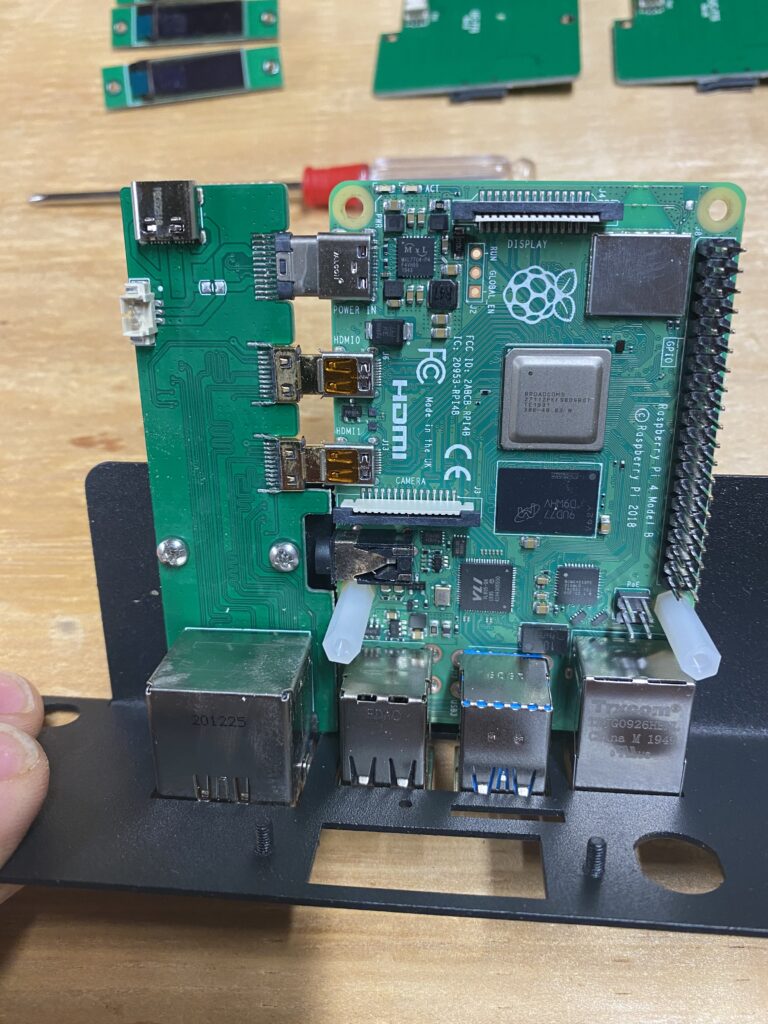
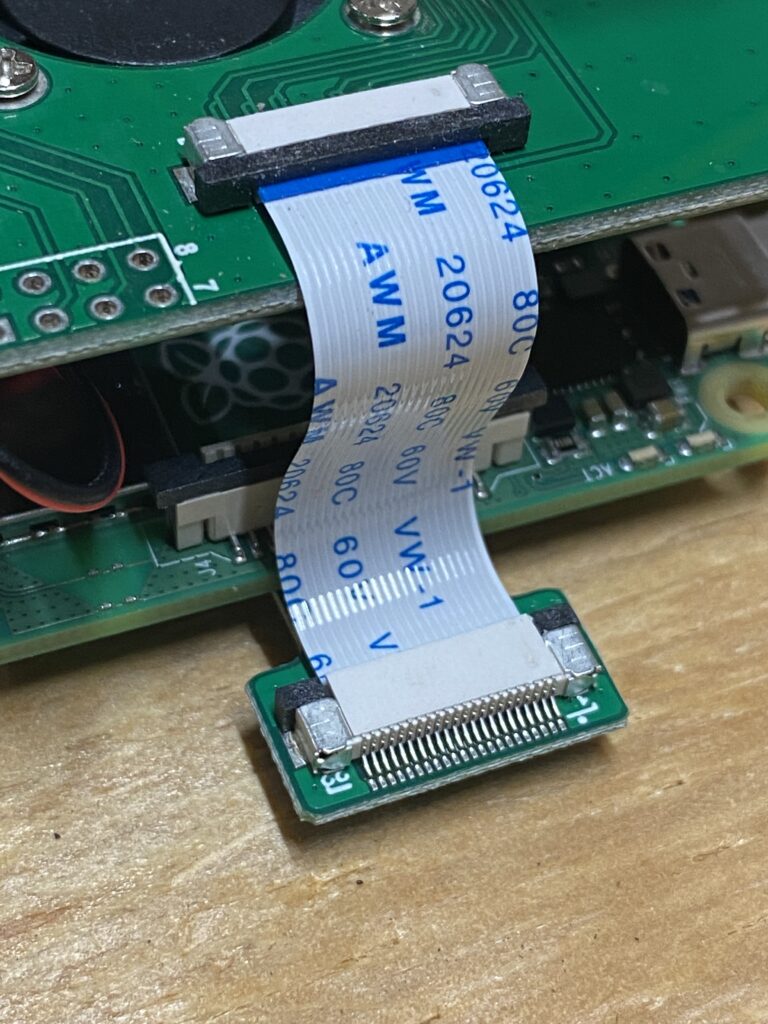
Next step is to install the SD card port and the fan HAT. Here’s a closeup from the finished build to see the HAT. Nice thought to make the SD card slot front-facing! The fan was an added bonus, too! Double-check the nuts that hold the fans in place. Mine were pretty loose and as a result, the fan noise was quite loud! A #0 Philips and some needlenose pliers will make short work of this.
The SD card slot on the Raspberry then gets an insert that has a ribbon cable to attach to the HAT mounted in the last step.
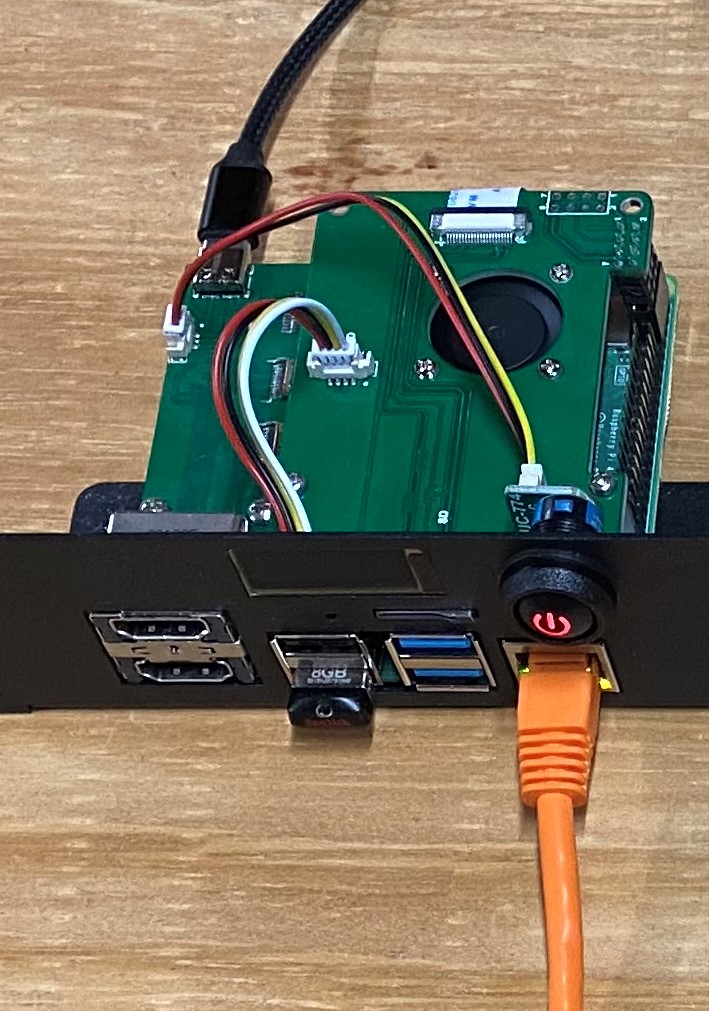
https://amzn.to/2T0628WThe OLED displays gave me the most trouble. They mount with two nuts, tightened to screwposts on the panel. The screwposts were quite short which made starting the nuts a challenge, which was only exacerbated by the powder-coating which made the connection very tight. Installing the nuts without the panel in place let me tighten and loosen them a couple of times made installing the panel nuts must MUCH easier. I also realized that the cutouts in the panel fit the outside edges of them perfectly. The one OLED needed a little munging to get it to fit. I think there’s a little double-sided tape holding the OLED assembly together, so a little patience will be rewarded. GENTLY push the OLED into the silkscreened square on the circuit board and then quickly drop the assembly onto the screwposts, hold it in place and tighten the screws. A 5mm socket driver is CLUTCH for this! Tighten until the OLED is flush against the front.
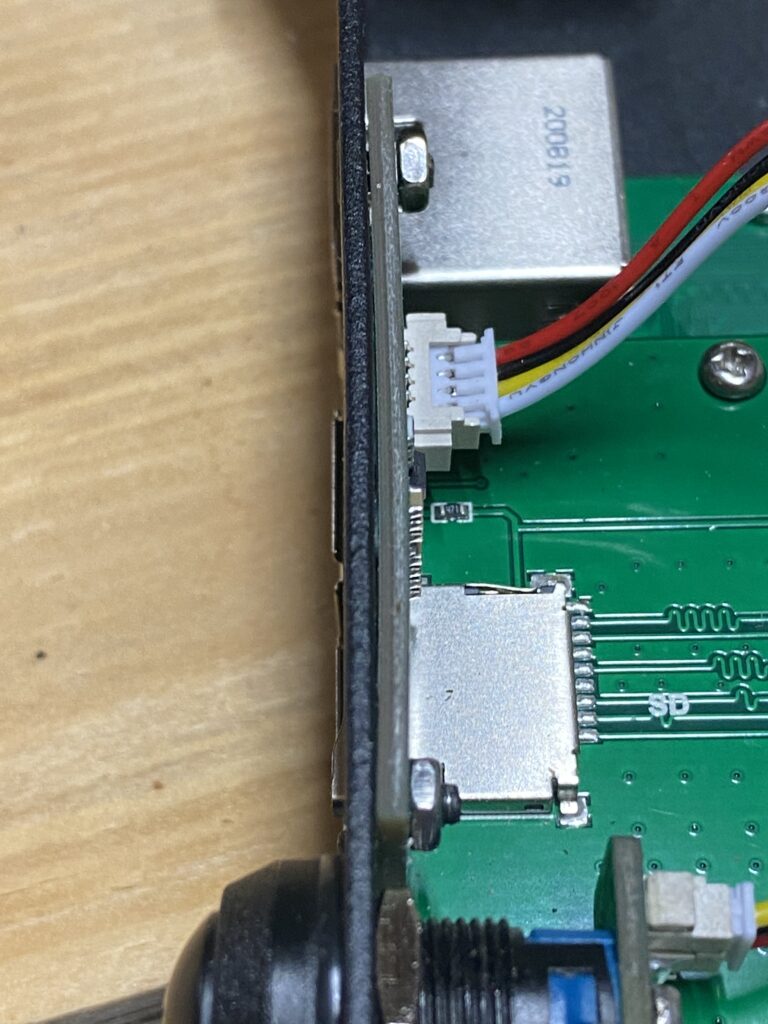
Finally, installed the power pushbuttons and the jumper wires and your assembly is complete. There is a jumper from the HAT to the panel and there’s a jumper that connects the power redirector to the front-side pushbutton. Here’s the complete assembly, ready for testing and programming the OLED panels. I’m using a RAVpower charging brick to power the Raspberries.
Next post, I’ll walk you through my pain of writing the python3 script that makes the front panel OLED for each RPI so awesome and why I hate python libraries.
John, awesome build, thank you for the inspiration!
What are you using to power your PIs, shown in the last picture?
This thing: https://amzn.to/3oG0aOa
Hey John – Thanks for the detailed build info! Do you believe the rack kit would accomodate a PoE hat while allowing for the front-facing SD card slot? I have a Ubiquiti PoE server, so it seems like a good match up if UCtronics have made an allowance for it.
No, it’s either the SD HAT or the PoE hat. OR There’s this: https://amzn.to/3wyNM5F