You probably have a nice media collection on your server: .mkv files, .mp3 files, .jpgs, playlists and you’ve been looking for a way to organize them and enjoy them. Enter KODI, the multi-media player. KODI is a great way to view all your media files. With a little bit of reorganization, planning, and installing, you can have a great media library and a seamless way to access it!
The easiest way to set up Kodi to run on your Raspberry is with a fork of the code called “LibreElec”. You can download an image to install on your boot media to get it running! No more hassling with weird dependencies and arcane video configuration!
Head over to LibreElec’s website and download the image appropriate for your hardware. Burn the image to a USB drive and boot it up! Yes, I said USB drive! Nobody’s using SD cards, anymore! C’mon!
Now, we’ve gotten a little ahead of ourselves. We need to take a step back and consider what we’re going to be playing on our Raspberry HTS and take a minute to get everything ready.
Organize Your Media Library
The best way to run Kodi is from an organized file structure. TV shows in one directory, movies in another. This file structure can be on a local external USB drive OR sitting on your NAS (which is how I do it). Check out my article on setting up OMV, if you need Network Attached Storage!
/media
   /movies
   /tvshows
      /The Flintstones
      /Barney Miller
      /I Dream of Jeannie
      /The Odd Couple
   /music
Movies should be named in the following format:
Aladdin-1992-720p.mkv
American-Factory-2019-1080p.mkv
Frozen-II-2019-1080p.mkv
Race-2016-720p.mkv
     or
The Dark Knight Rises (2012) 720p.mkv
Mostly, I try to get the title, the release year, and the quality in there. This really helps KODI when it’s cataloging everything. Spaces, underbars, and dashes all work.
TV Shows are a little different. Dump all the episodes in the named directory for the title of the series. Then, rename the files for the season and the episode, like this:
S01E01.avi
S01E02.avi
S01E03.avi
S01E04.avi
S01E05.avi
S02E01.avi
S02E02.avi  and so on...
Finally, music. I like to do
/media
   /music
      /Steely Dan
         /Aja
         /Everything Must Go
            1-The Last Mall.mp3
            2-Things I Miss the Most.mp3
            3-Blues Beach.mp3
            4-Godwhacker.mp3  ...
      /Queen
         /Jazz
         /News of the World
Make the Connection
Once everything is in place and renamed, you can move your USB drive to attach to your Kodi Raspberry or remote mount the NFS share on the Raspberry. Now, boot up your new HTS (Home Theatre System). LibreElec will walk you through the initial setup. Pretty straightforward. Make sure you choose your WIRED network connection! It will show up as “online”. Click next.
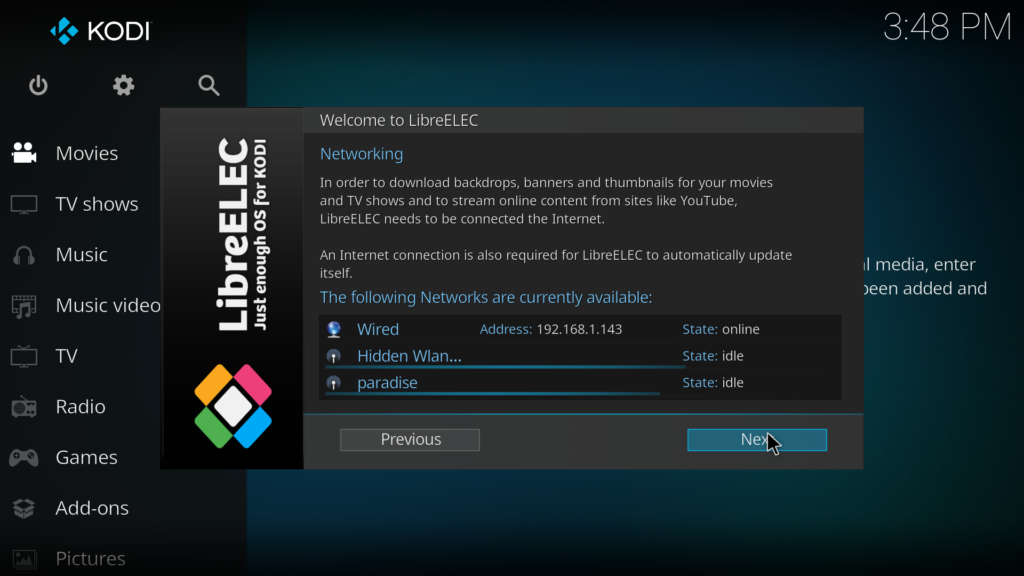
Once you click NEXT enough times, you’ll land on a disconcerting screen about having no media to play! No worries! You just need to tell KODI about where you’re keeping things. So, let’s take a look at “Add Media…”
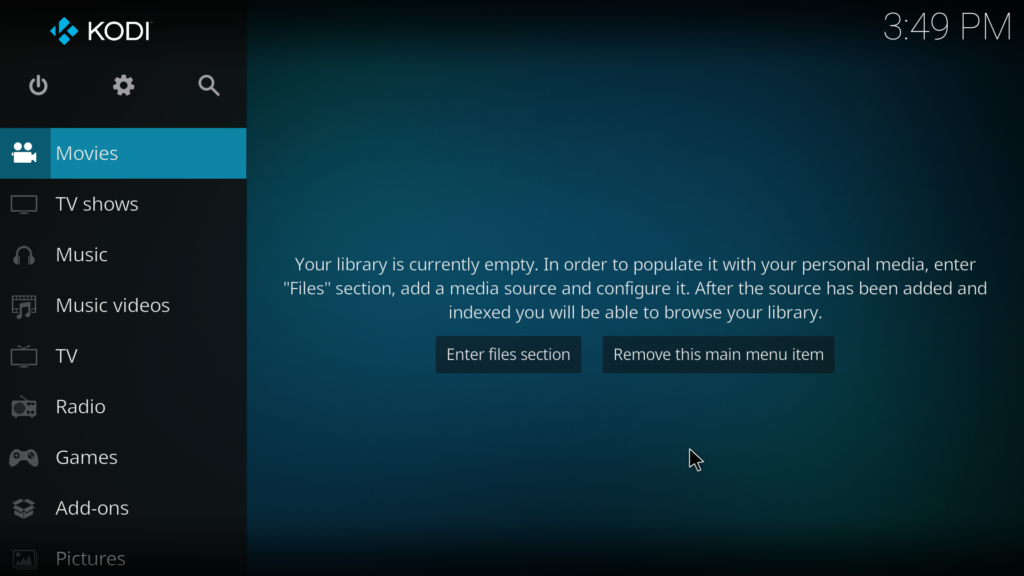
Click on “Enter files section” and browse to either your USB drive or cursor down to NFS and then browse from there. Let’s do Movies first. My stuff is on my NAS that sharing with NFS so I’ll choose that, but then there’s a brief pause while the system scans your network for shares. I assume SAMBA would work the same way, but I’m a purist and don’t use SAMBA on Linux-based clients. Click on the IP address of the NAS and then navigate to the directory that you saved your movies in. You’ll know you’re there when you see your list of movies. Click OK and then OK again.
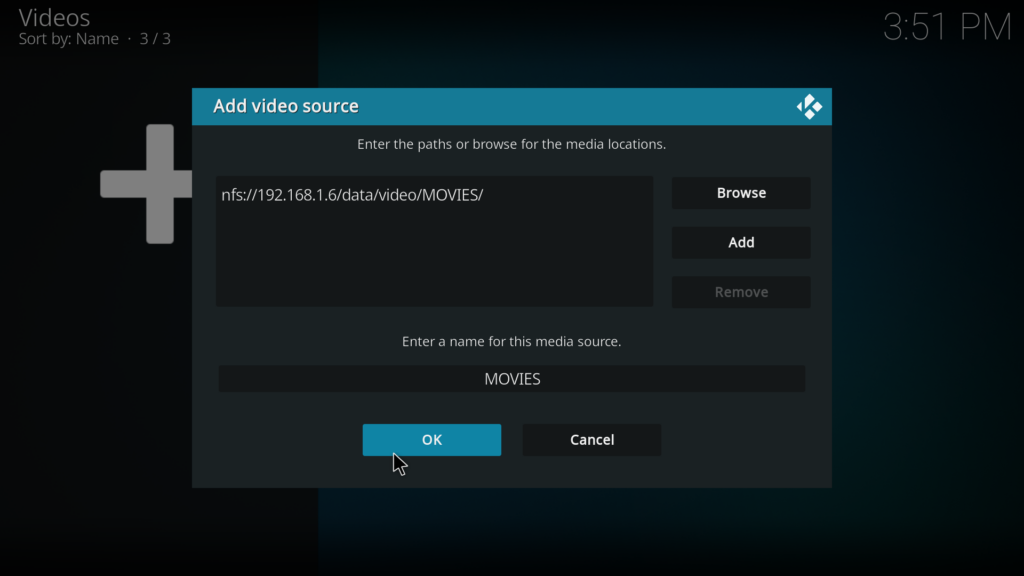
Be careful on this next screen! You need to tell KODI that it’s looking for movies in this directory. So, change the “This directory contains” pulldown to say Movies and that you want to rely on “The Movie Database” to fill in the thumbnail information. IF you put your movies into separate folders that are named after each movie, make sure to turn ON the first two sliders!
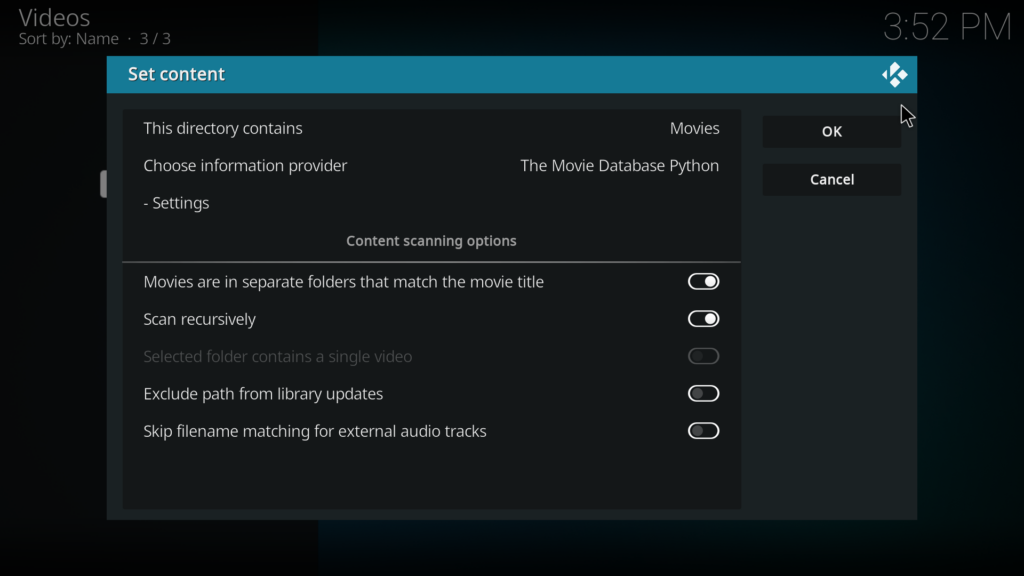
Hit OK again and then click YES to “refresh information for all items within this path”. If everything is working you’ll see the program start indexing in the upper-right-hand corner:
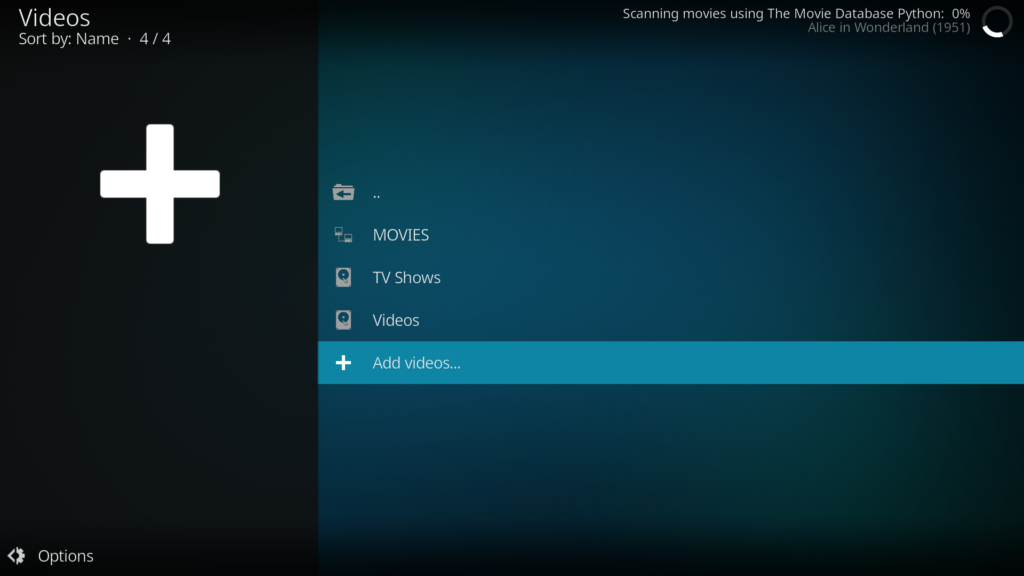
Depending on the size of your library, this could take A WHILE! Let it cook. Don’t try to do anything during this process. Your Raspberry is very busy–reaching out to the Internet database, doing fuzzy matches against your library titles, downloading thumbnails. Just step away.
Once it’s done, you can repeat the process for your TV shows and music files.
When you’re all done, you should have a nice-looking interface to access all your media as promised! Glue the Raspberry Pi to the back of your biggest TV and ENJOY!
Now, if you’re like me, you’re going to want Raspberry PIs behind ALL the TVs in the house and you’re not going to want to do this whole “Add Media” process every.single.time. Good news! You centralize your library metadata in a MySQL database and point all your Raspberry Pis at it!! Check out my next KODI post!
LibreELEC is Read Only?
One little feature of installing LibreElec from an .img file is that the filesystem where the OS is installed is mounted read-only! If you try to change the hostname or install anything OS related, it will fail. The work-around is to remount the filesystem read/write. It’s easy:
LibreELEC:~ # mount -o remount,rw /dev/mmcblk0p1  /flash
LibreELEC:~ # hostname kodi-bed
kodi-bed:~ # cat /etc/hostname
kodi-bed
kodi-bed:~ # reboot
Setting the Clock in Kodi
The on-screen clock is probably wrong. Well, actually the timezone is wrong, so at least the minutes past the hour are correct, but that’s no way to live. Let’s change the timezone in settings. Hit ESC (or back) to get out of the movie menu. Left arrow and Up arrow to get to the top of the main menu and click on the GEAR icon. That will put you in the System menu:

From there, choose Interface.
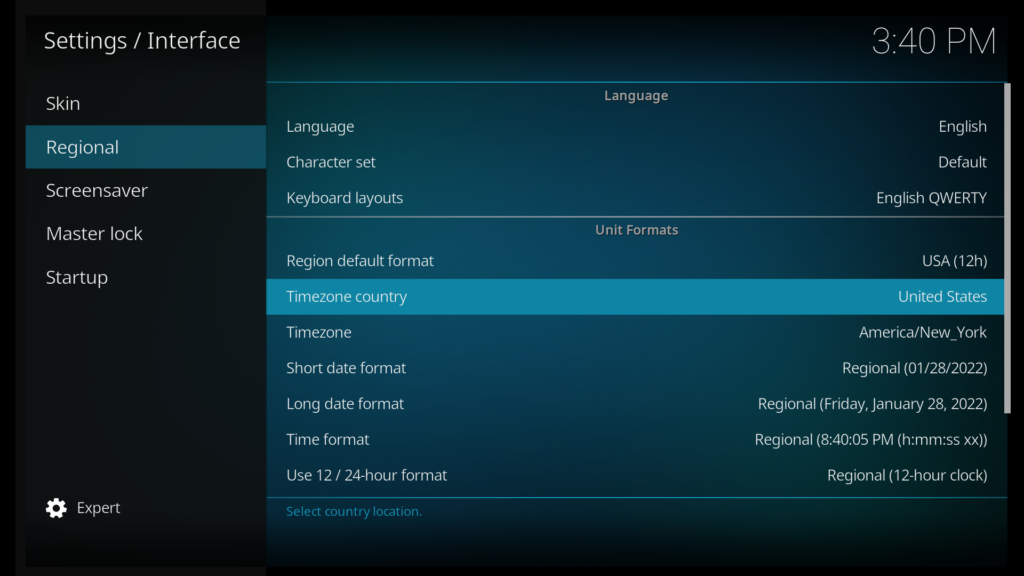
That’s where you can set your International Settings. Leaving the menu will save your customizations. The only other thing that (I think) you really want to adjust sooner-than-later is the screen size!
How to Fix Overscan on KODI
Hit the gear icon again and then choose the tile with the gear and the screwdriver. Arrow all the way down and change the menu choices from “Basic” to “Expert”. Right-arrow and then down to select “Video Calibration…”. You’ll get a big white square on the screen. Right arrow and down until the framing corner comes into view in the upper right-hand corner of the screen. Then hit enter. Now, Left arrow and up to pull the other corner up into place. Enter. Enter. Esc. Esc. Better?